Estimates & Invoices
Estimates Overview
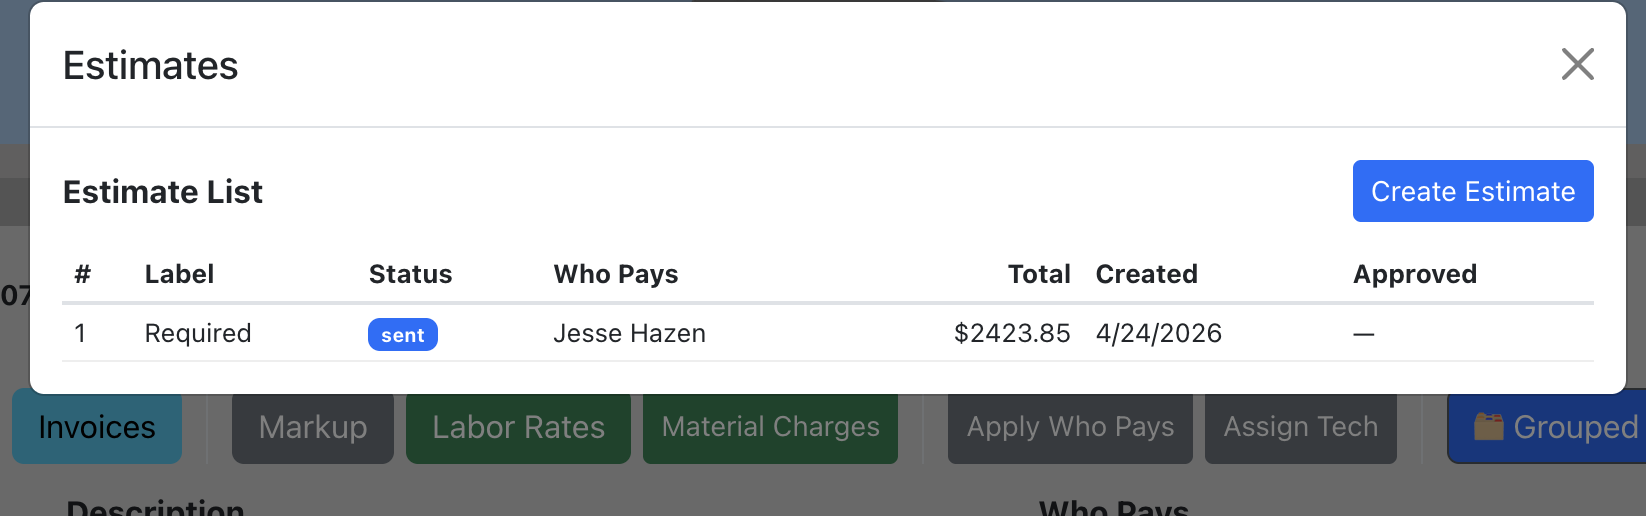
Estimates let you present repair costs to customers for approval before work begins. Each estimate is tied to a "Who Pays" contact and automatically pulls line items from the job. Estimates go through a lifecycle: Draft → Sent → Approved (or Declined). You can also void estimates. Lines can also be placed on multiple estimates in case you want to give a few options to the customer.
Create an Estimate
- Open a job and go to the Line Items section.
- Click the "Estimates" button.
- Click "Create Estimate".
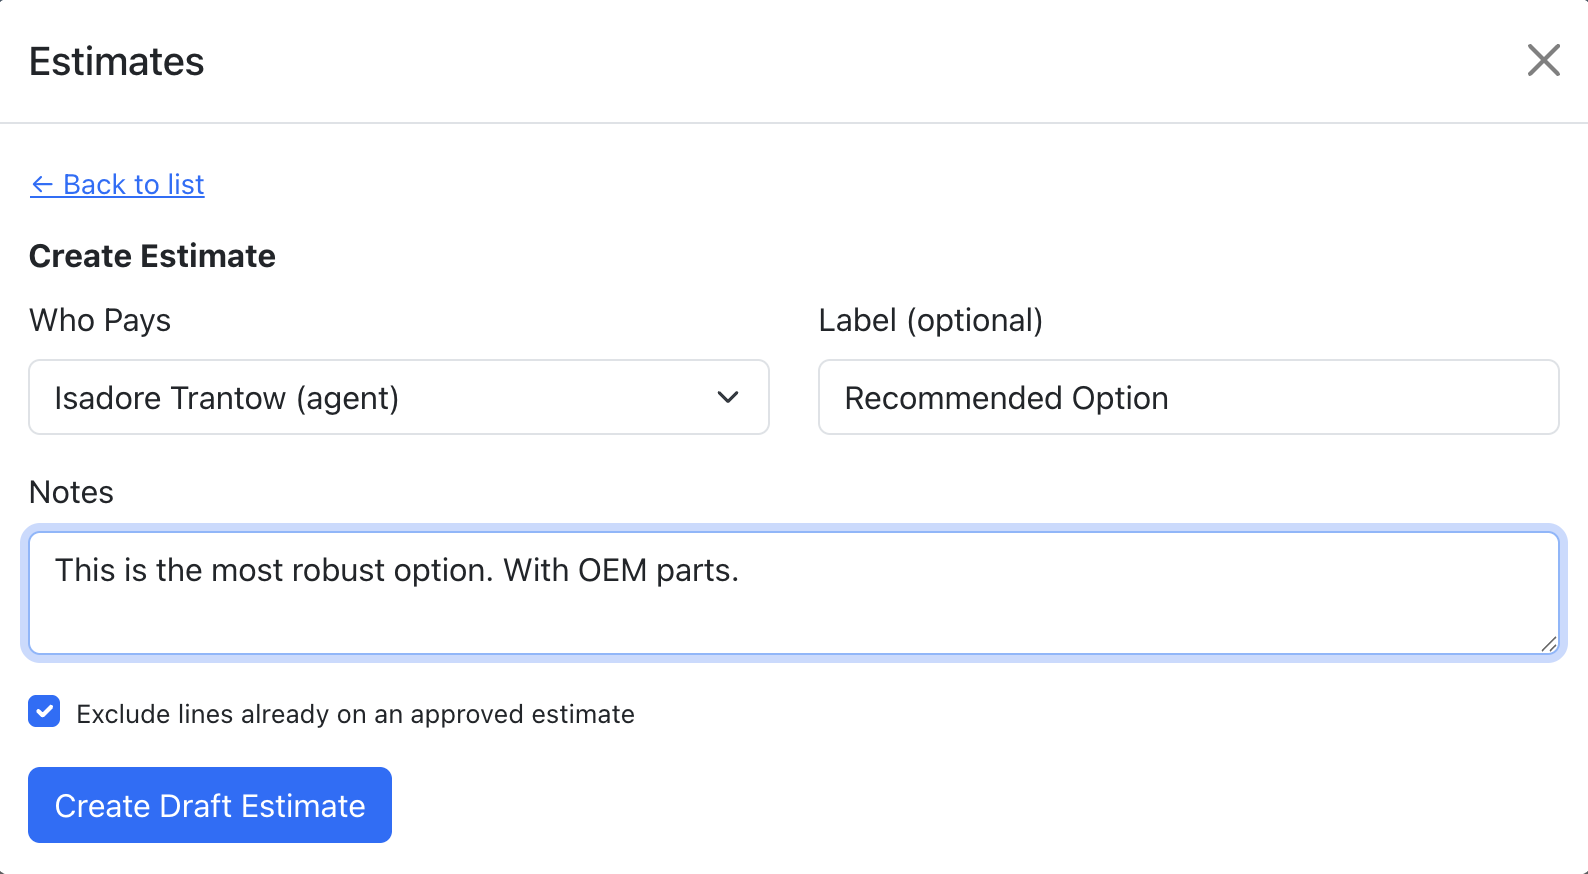
- Select who pays from the dropdown (contacts on the job).
- Optionally add a label (e.g. "Required", "Recommended", "Supplement") and notes.
- The "Exclude lines already on an approved estimate" checkbox prevents duplicate billing.
- Click "Create Draft Estimate". The system auto-generates line items from the job's line items that match the selected "Who Pays" contact.
Send an Estimate
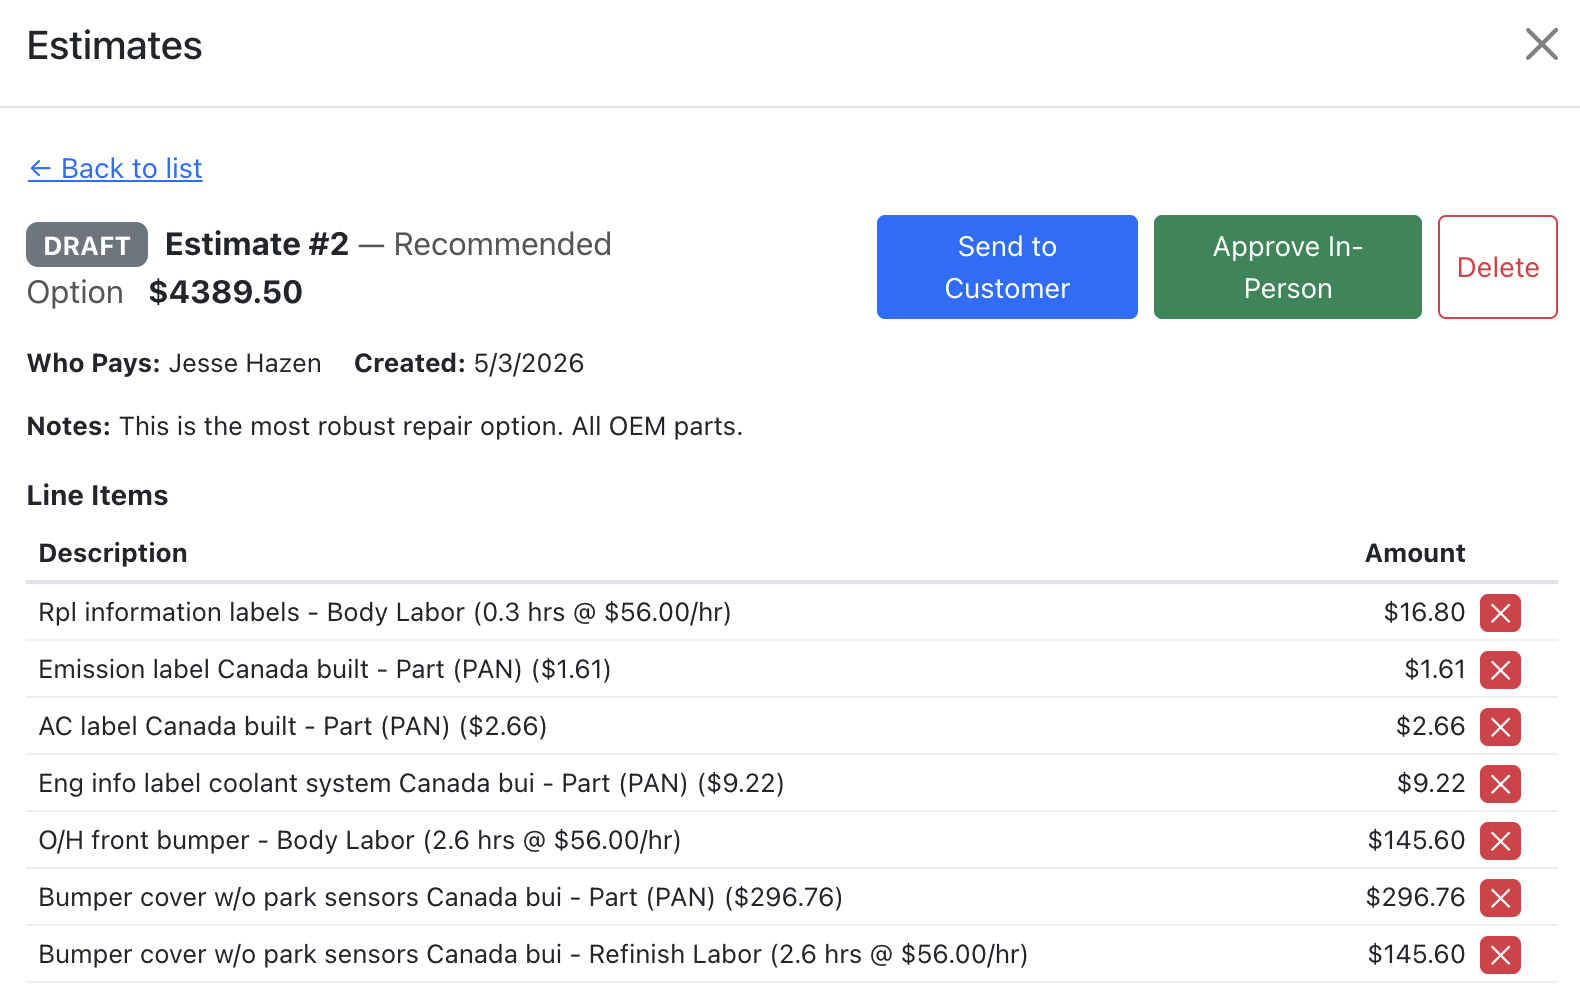
Once a draft estimate is ready, you can send it to the customer.
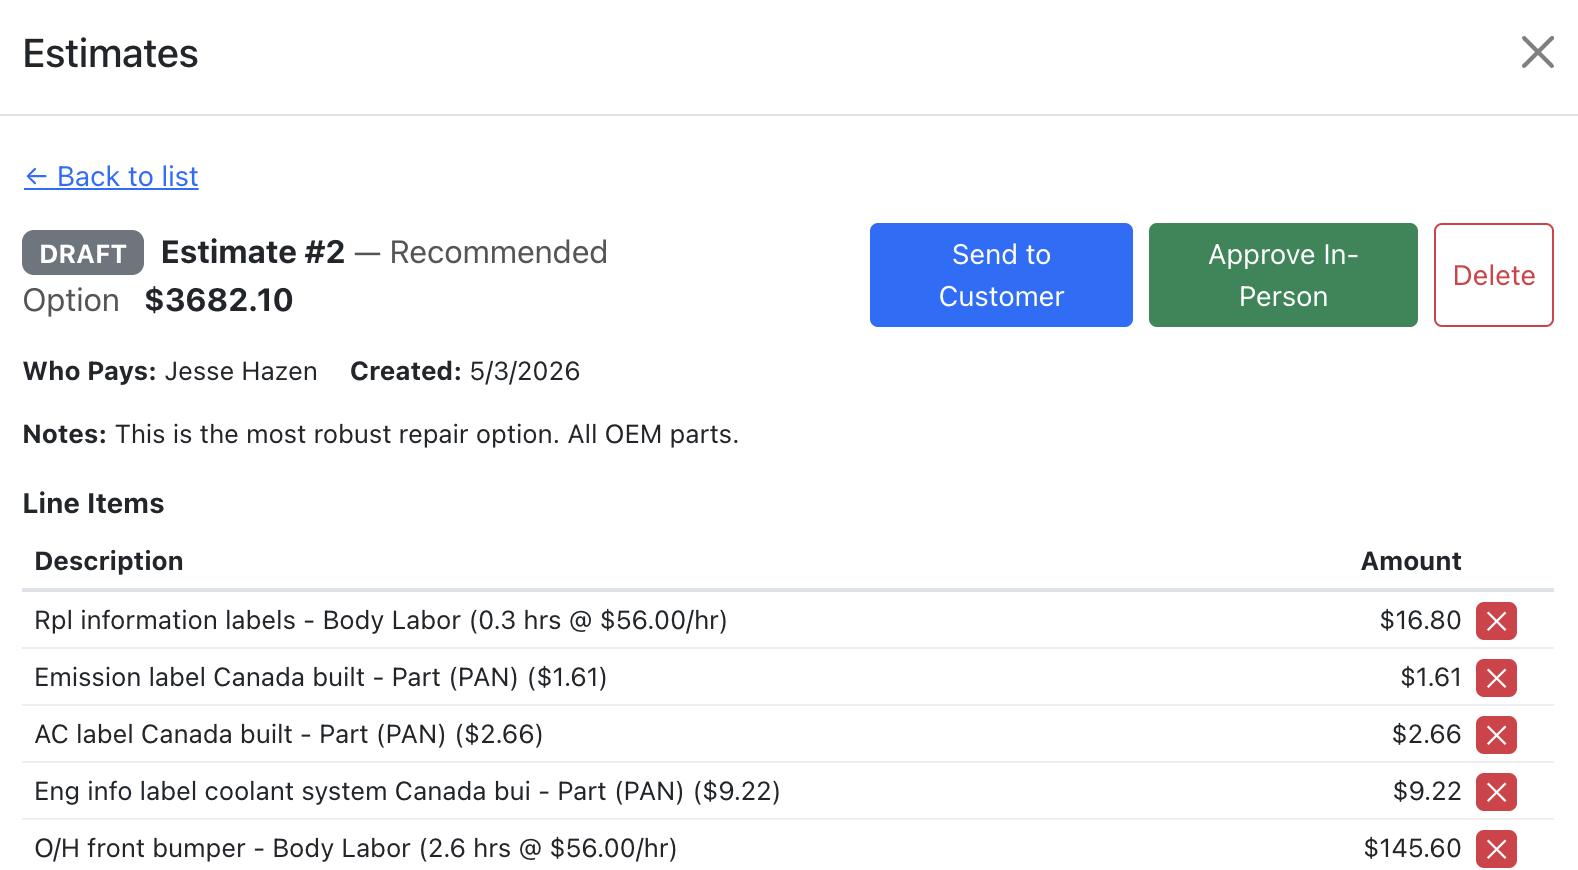
- Open the estimate detail view.
- Click "Send to Customer".
- Choose a delivery method:
- Send via Email — Sends an email with estimate details and an approval link. Requires the customer to have an email on file with consent.
- Generate Link Only — Creates an approval link you can share via text, chat, or in person. No email is sent.
After sending, you can also copy the approval link at any time using the "Copy Approval Link" button.
Approve In-Person (Kiosk Mode)
Overview: Kiosk mode lets a customer approve an estimate on your device in person. The screen locks into a full-screen kiosk view that the customer cannot navigate away from.
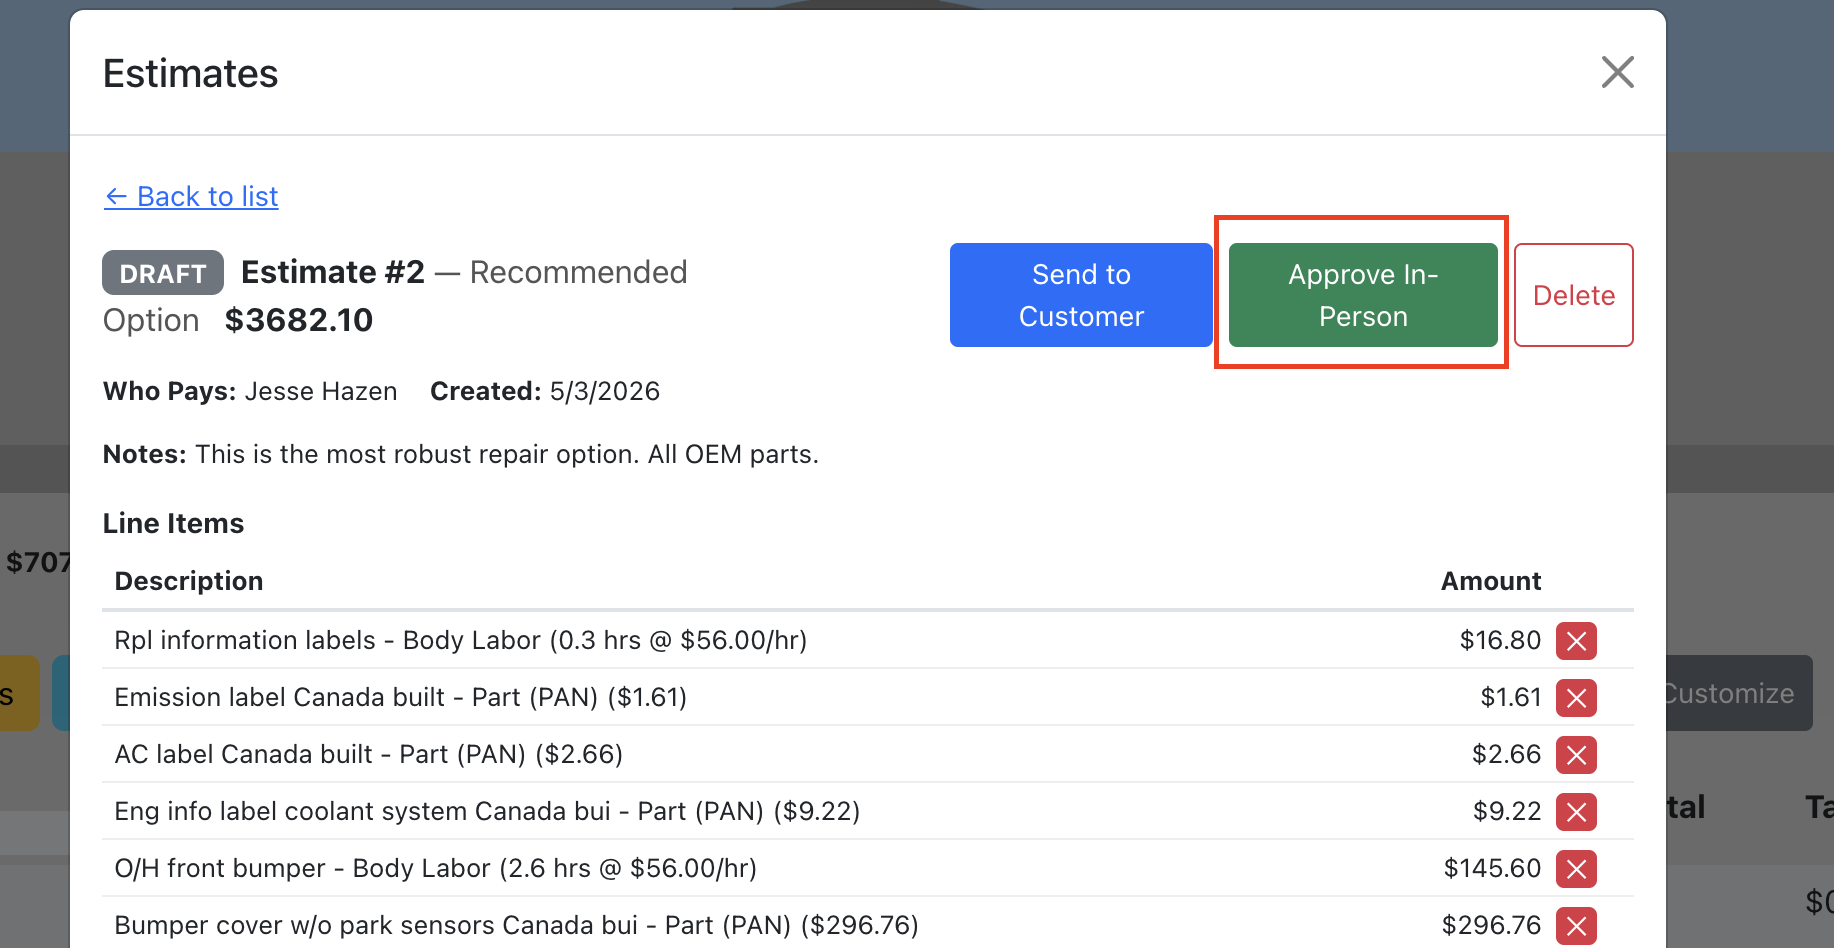
- Open the estimate detail view.
- Click "Approve In-Person".
- The device enters kiosk mode showing the estimate details.
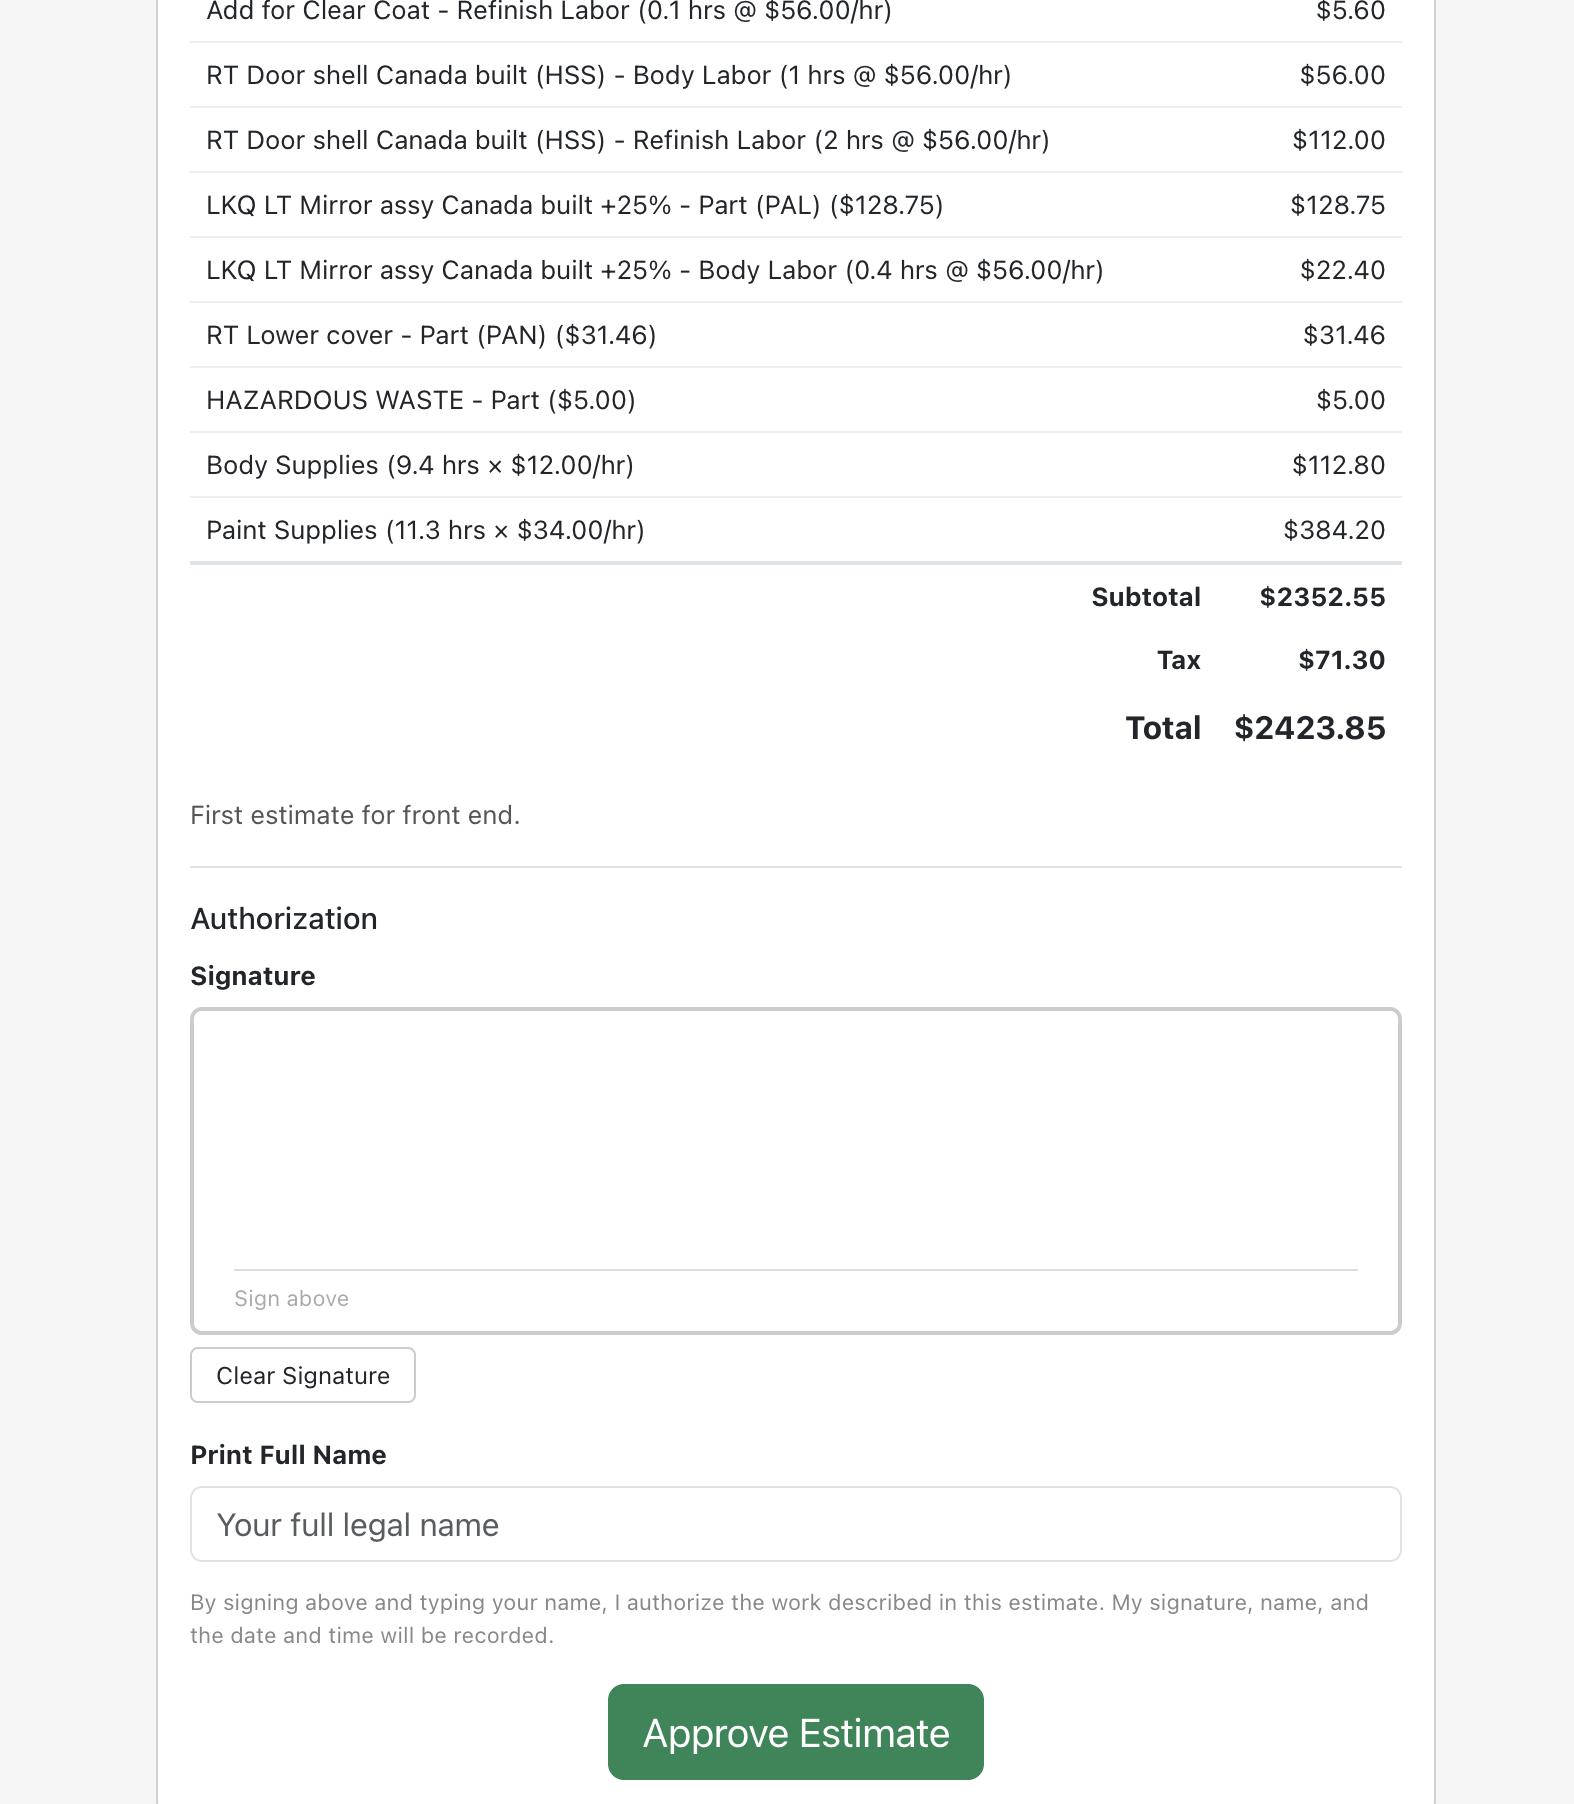
- The customer reviews the line items, signs with their finger or stylus, types their full name, and clicks "Approve Estimate".
- After approval, a confirmation screen appears asking them to return the device.
- An employee exits kiosk mode using the lock icon and entering the shop's PIN.
Customer Approval
When a customer receives an estimate (via email or link), they see the estimate details and can approve it with a signature and their printed name. The signature, name, date/time, and user agent are all recorded.
After approval, the shop can view the approved snapshot — a frozen record of exactly what the customer approved, including line items and totals at the time of approval.
Manage Estimates
- Add/Remove Line Items — While in draft status, you can add or remove individual line items from the estimate.
- Void/Delete — Draft estimates can be deleted. Sent estimates can be voided.
- View Approved Snapshot — For approved estimates, click "View Approved Snapshot" to see the exact line items and totals at the time of approval.
- Filter Line Items — In the main line items table, use the Estimates column filter to show only line items on a specific estimate or by status.
Invoices Overview
Invoices allow you to bill customers and receive payments. You have two options:
- Stripe Invoice — Powered by Stripe Connect. Sends a payment link to the customer for online payment. Requires Stripe Connect setup in Company Settings.
- Offline Invoice — Creates an invoice locally without Stripe. Ideal for customers paying by cash, check, or bank transfer. No Stripe account or customer email required.
Both types go through a lifecycle: Draft → Open → Paid (or Void). You can print any invoice for physical records.
Create an Invoice (Stripe)
- Open a job and go to the Line Items section.
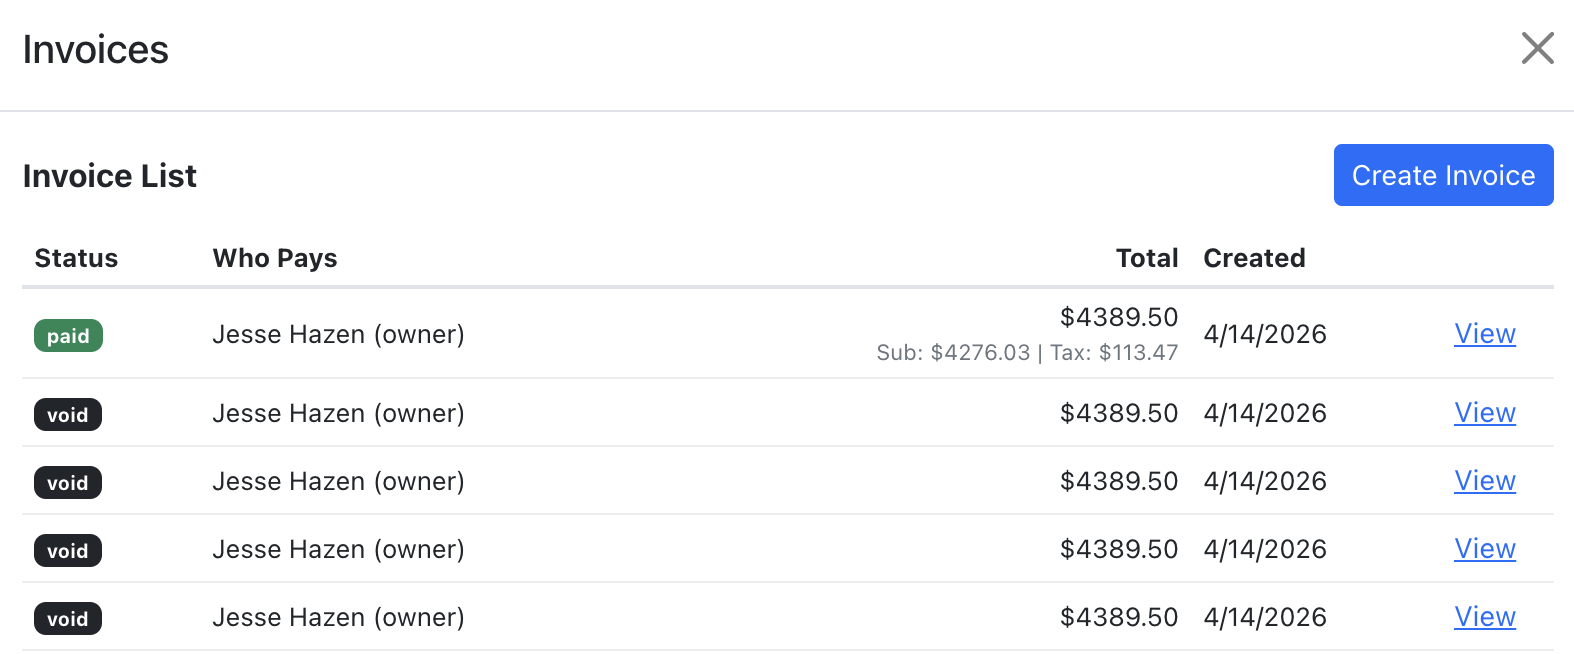
- Click the "Invoices" button.
- Click "Create Invoice" (requires Stripe Connect to be set up).
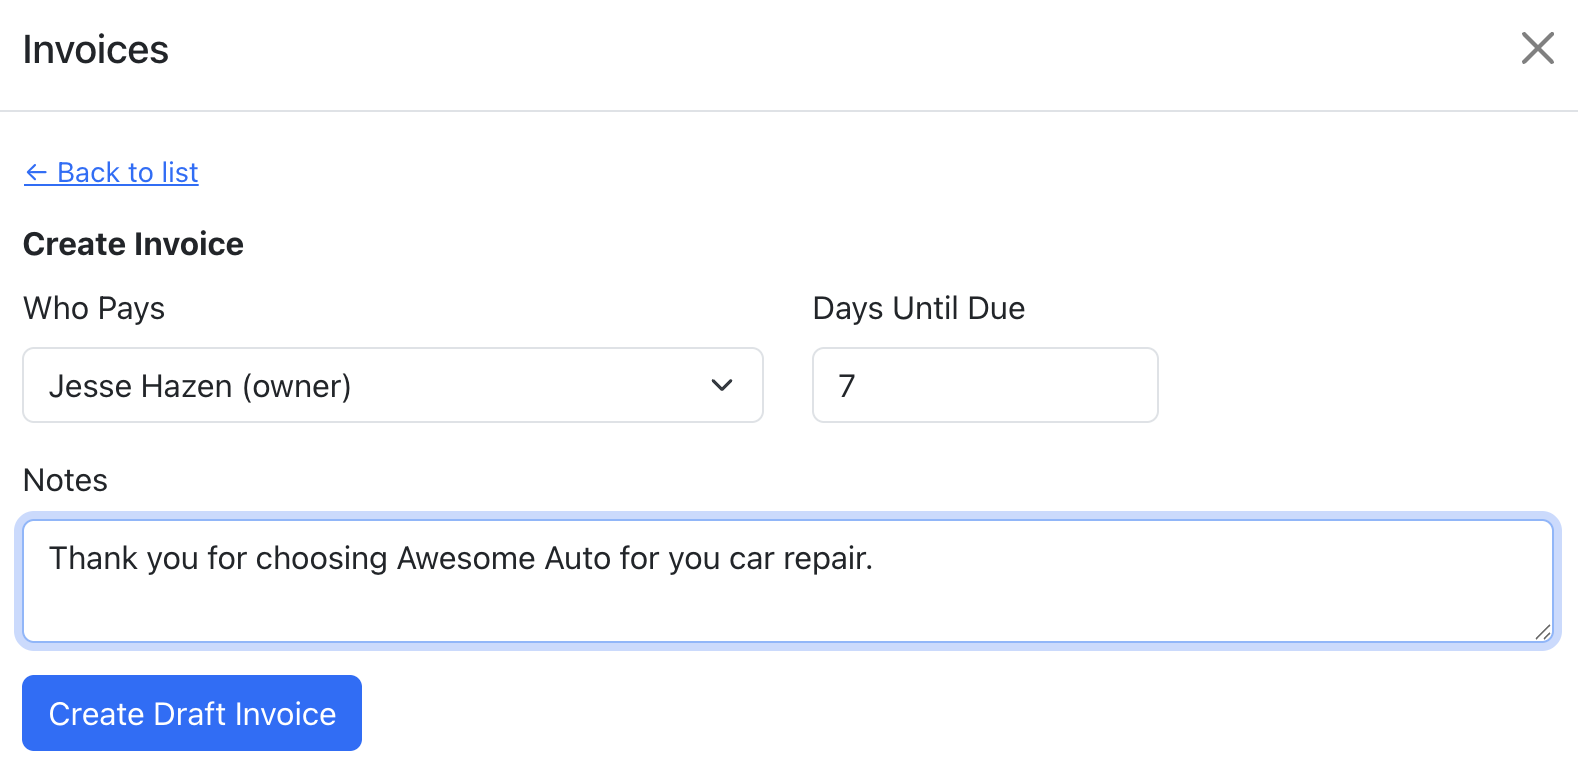
- Select who pays from the dropdown.
- Set the days until due (default 30).
- Optionally add notes.
- Click "Create Draft Invoice". The system auto-generates line items from the job's line items matching the selected contact, including tax and material charges.
Prerequisite: You must set up Stripe Connect in Company Settings before creating Stripe invoices. See the Stripe Connect setup guide.
Create an Offline Invoice
Offline invoices don't require Stripe Connect or a customer email. Use them for walk-in customers, check payments, or any situation where online payment isn't needed.
- Open a job and go to the Line Items section.
- Click the "Invoices" button.
- Click "Create Offline Invoice" (always available, no Stripe required).
- Select who pays from the dropdown.
- Set the days until due (default 30).
- Optionally add notes.
- Click "Create Offline Invoice". The invoice is created with status "Open" and line items are calculated locally using your tax rate and material charge settings.
Offline invoices can be printed, marked as paid, or voided — just like Stripe invoices.
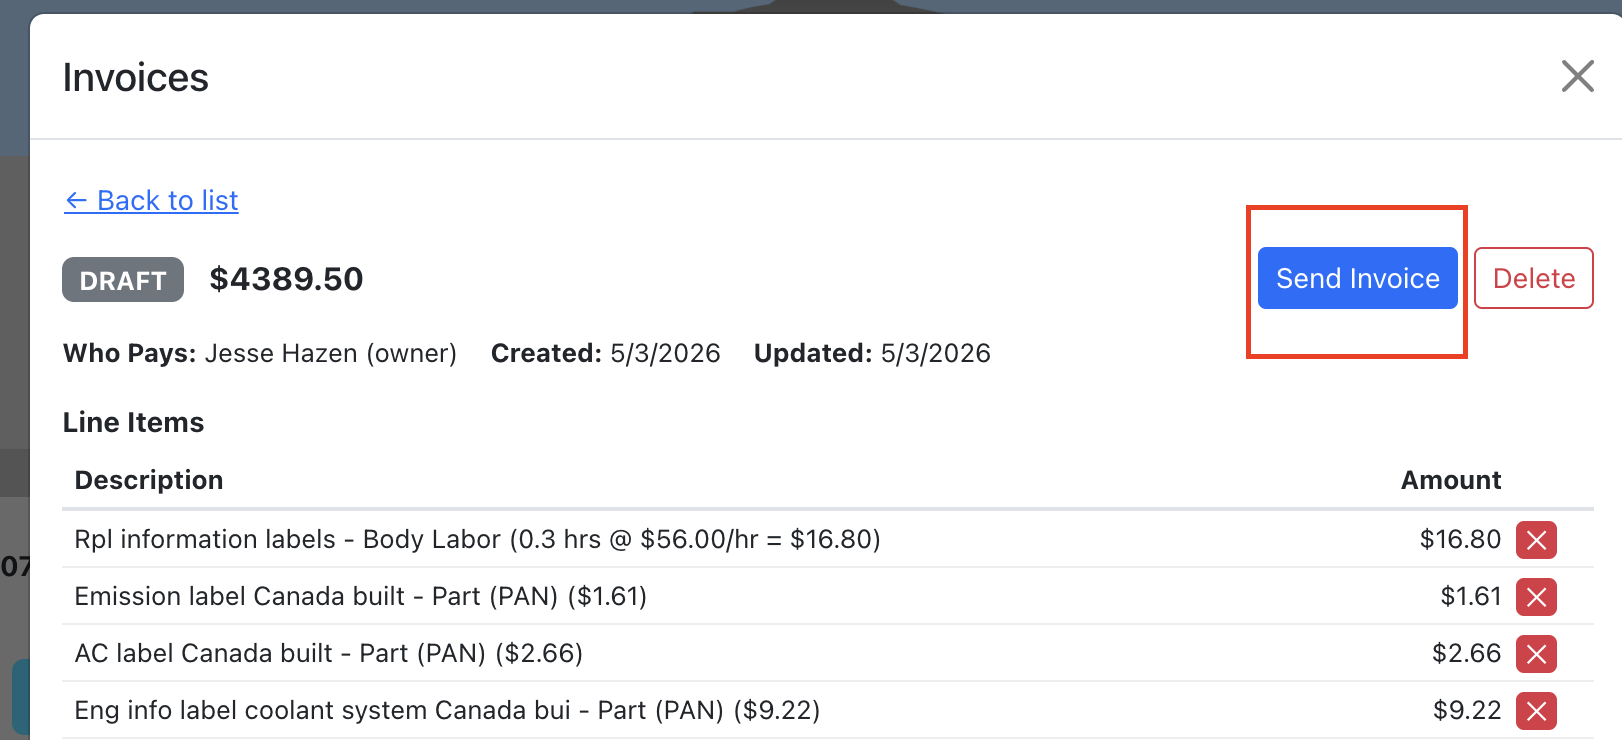
Send an Invoice
- Open the invoice detail view.
- Click "Send Invoice". This sends the invoice through Stripe to the customer's email.
- The customer receives a Stripe-hosted payment page where they can pay online.
You can also:
- Copy Payment Link — Copy the Stripe-hosted invoice URL to share manually.
- PDF — Open a PDF version of the invoice (Stripe invoices only).
Mark as Paid
When a customer pays outside of Stripe (cash, check, bank transfer, etc.), you can manually mark the invoice as paid.
- Open the invoice detail view.
- Click "Mark as Paid" (available on open invoices).
- Select the payment method: Cash, Check, Bank Transfer, or Other.
- Optionally add payment notes (e.g. check number, reference).
- Click "Confirm Paid".
The invoice status changes to "Paid" and the payment method is recorded for your records. If the invoice was also in Stripe, it will be marked as paid there too (out-of-band).
Print Invoice
You can print any invoice to hand to a customer or keep for your records.
- Open the invoice detail view.
- Click the "Print" button.
- A print-friendly invoice page opens in a new tab showing company info, customer details, vehicle info, line items, and totals.
- Click "Print Invoice" or use your browser's print dialog (Ctrl+P / Cmd+P).
- You can also "Save as PDF" from the print dialog to create a PDF file.
The printed invoice includes: company name and address, invoice number, dates, RO number, vehicle info, VIN, itemized line items with amounts, tax breakdown, and total due.
Manage Invoices
- Add/Remove Line Items — While in draft status, you can manually add or remove line items with custom descriptions and amounts (Stripe invoices only).
- Finalize — For offline draft invoices, click "Finalize" to move the invoice to "Open" status, indicating it's ready for payment collection.
- Mark as Paid — For open invoices, record an offline payment with the payment method and optional notes.
- Print — Print any invoice (any status) for physical records or to hand to the customer.
- Void/Delete — Draft invoices can be deleted. Open invoices can be voided. Voiding releases the line items so they can be re-invoiced.
- Filter Line Items — In the main line items table, use the Invoices column filter to show only line items by invoice status (paid, open, draft).