Scheduling & Appointments
Overview
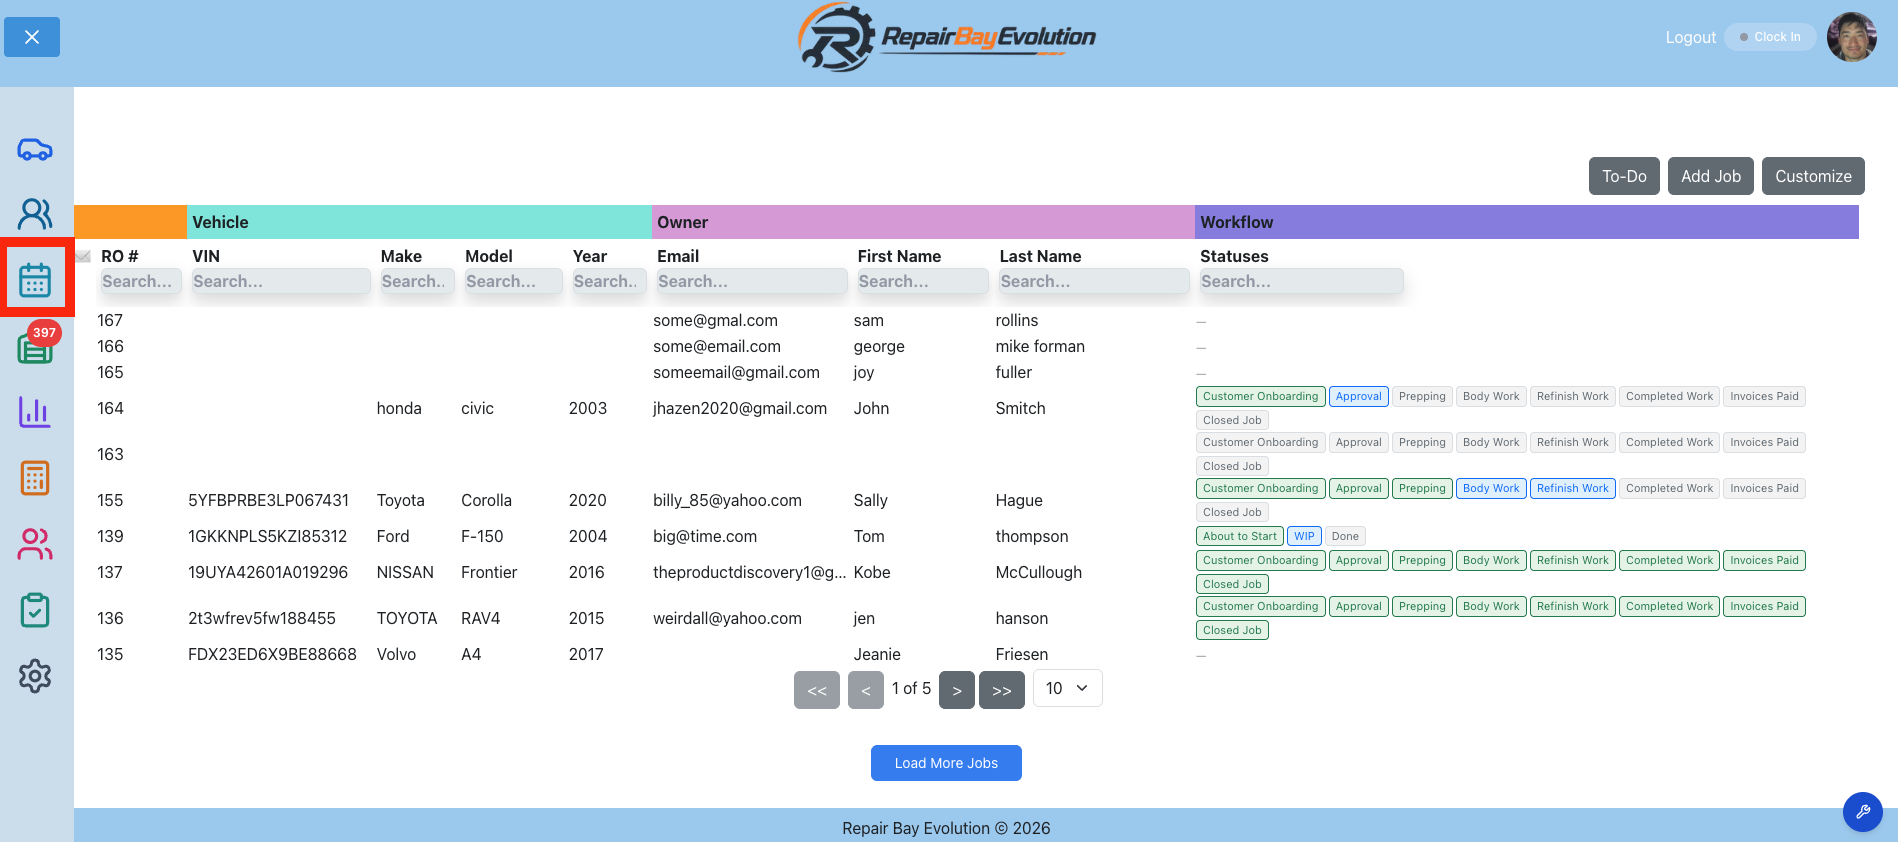
The scheduling feature lets you manage appointments across your shop. Access it from the Calendar icon in the sidebar or from the Appointments section on any job. Every appointment is linked to a repair order, keeping your schedule and work in sync.
Calendar Page
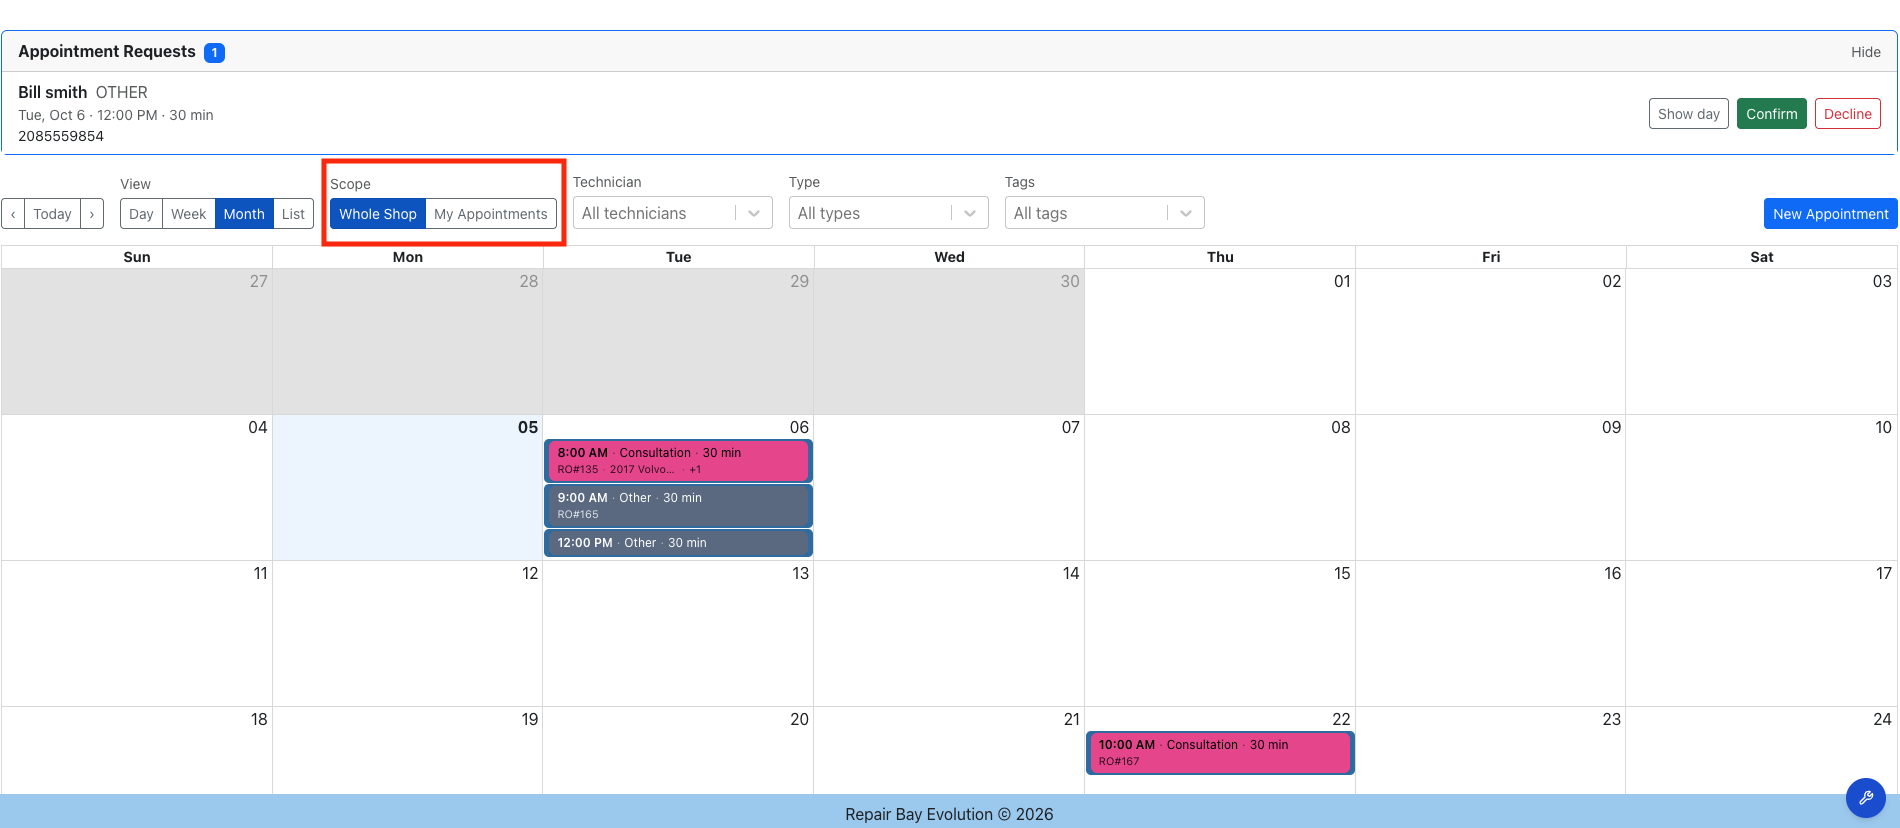
The /calendar route shows your shop's full scheduling picture. Switch between Day, Week, Month, and List views using the toolbar buttons. The day view shows the date you're currently viewing at the top.
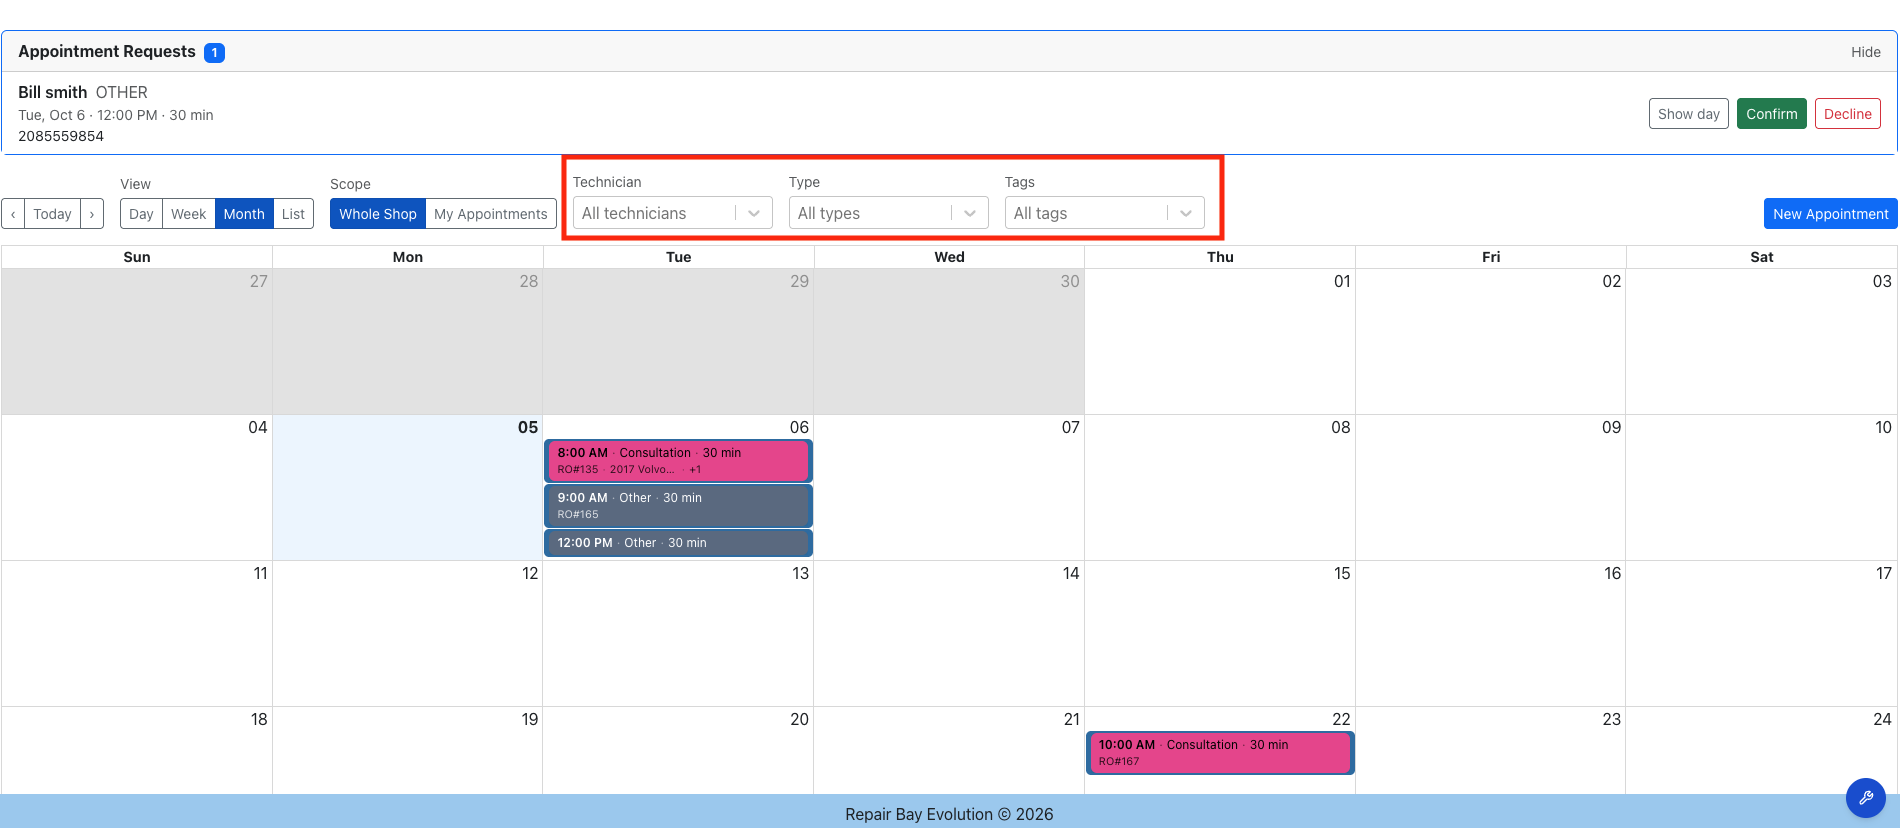
Use the toolbar filters (technician, type, tags) to narrow what's shown. The scope toggle switches between:
- Whole Shop — all appointments across the shop
- My Appointments — only appointments assigned to you
Appointment Panel (on Jobs)
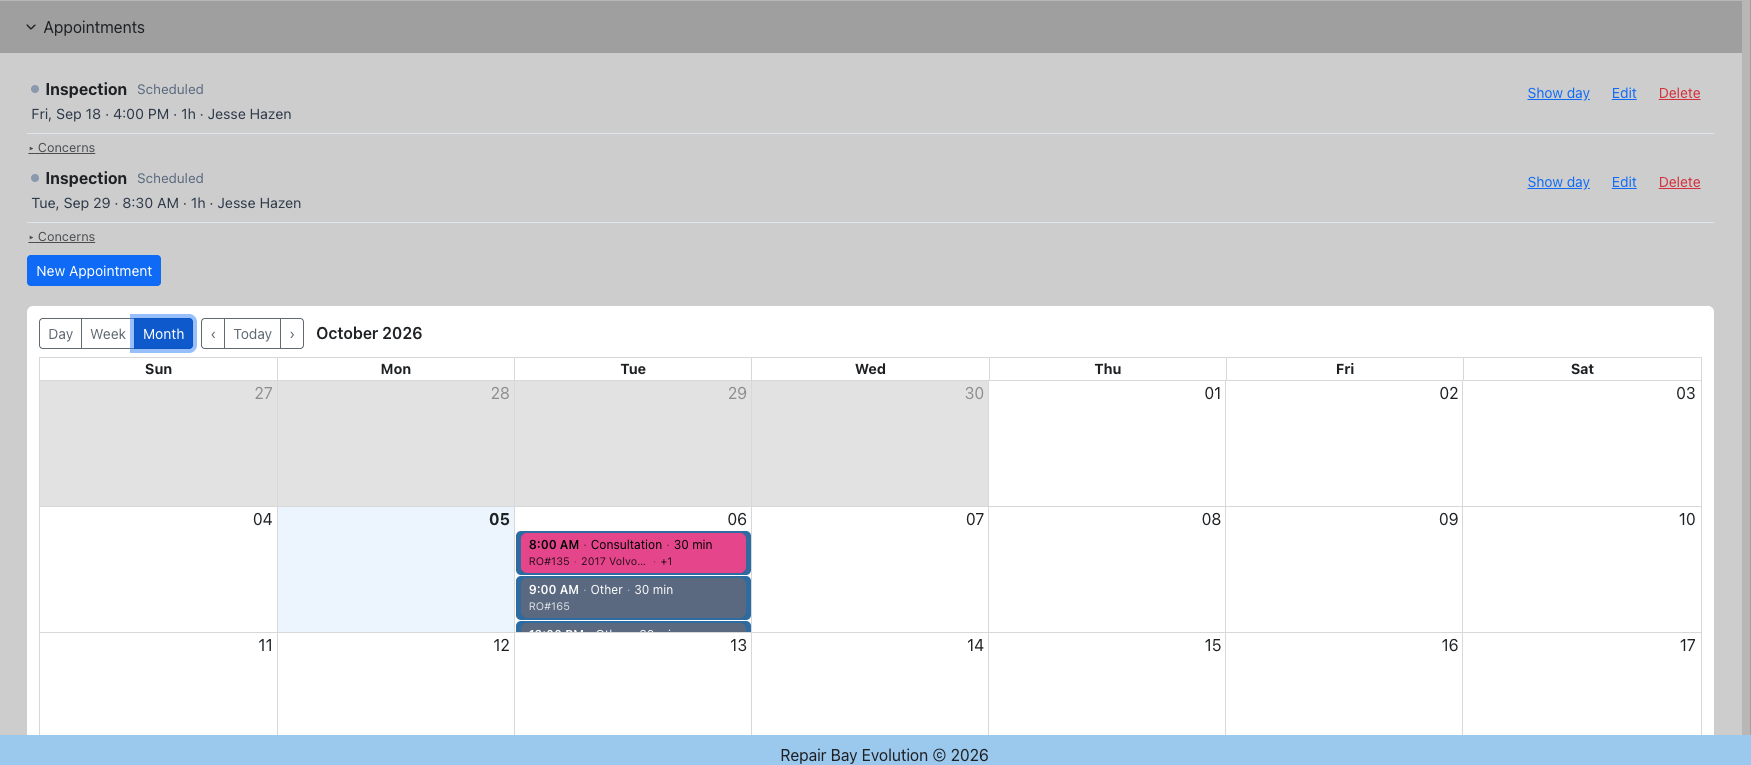
Each job has an Appointments section. Expand it to see appointments linked to that repair order, plus an inline calendar showing the shop's schedule for context.
Use the Day, Week, and Month views within the panel and navigate with the Prev, Today, and Next buttons.
Creating Appointments
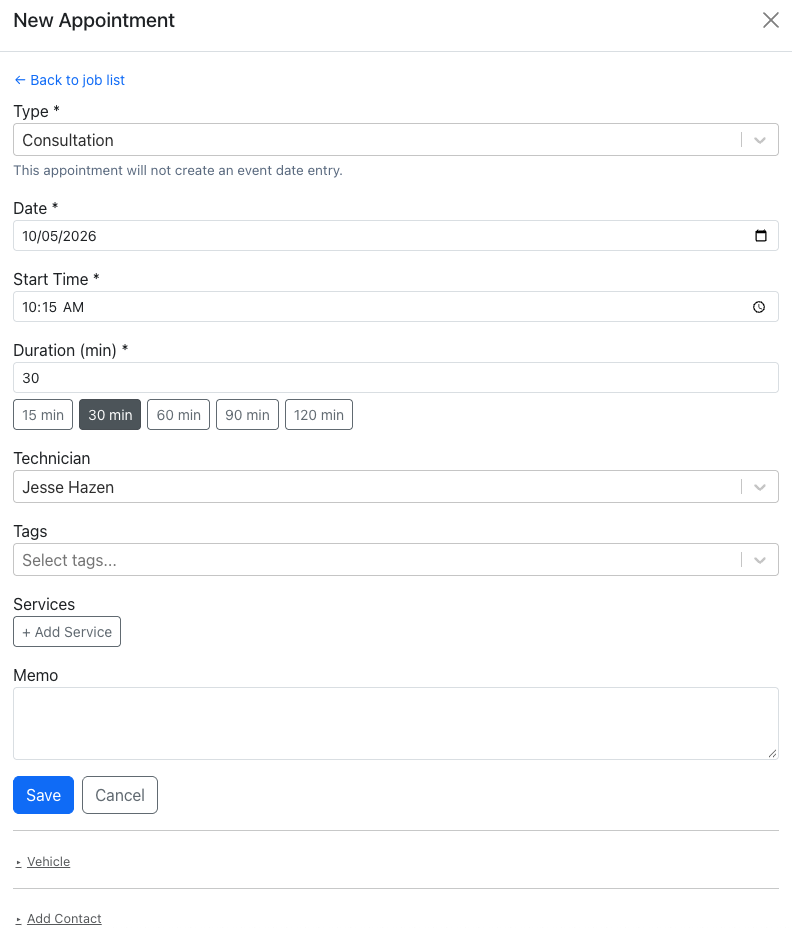
Click New Appointment from either the calendar page or a job's appointment panel. When creating from the calendar page, you'll first select which job to link the appointment to.
Fill in the following fields:
- Type — the appointment category (Drop-Off, Pickup, etc.)
- Date — the appointment date
- Start Time — when the appointment begins
- Duration — use the quick-pick chips or enter a custom value
- Technician — who is responsible
- Tags — optional labels for filtering and organization
- Services — attach service templates for planned work
- Memo — optional notes about the appointment
Editing & Deleting
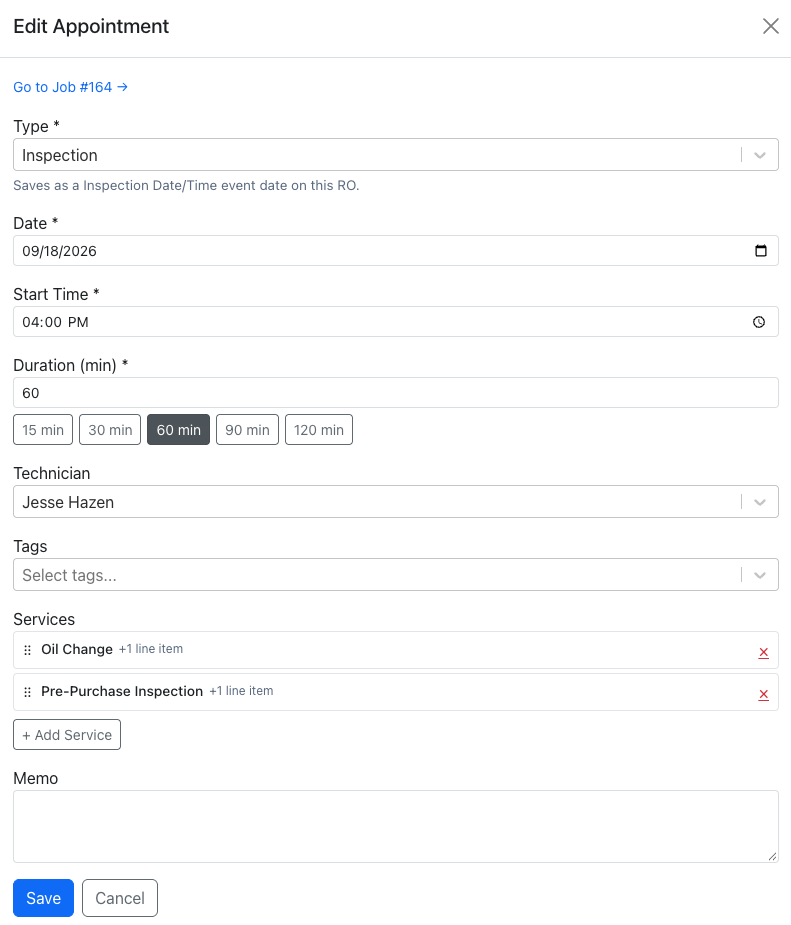
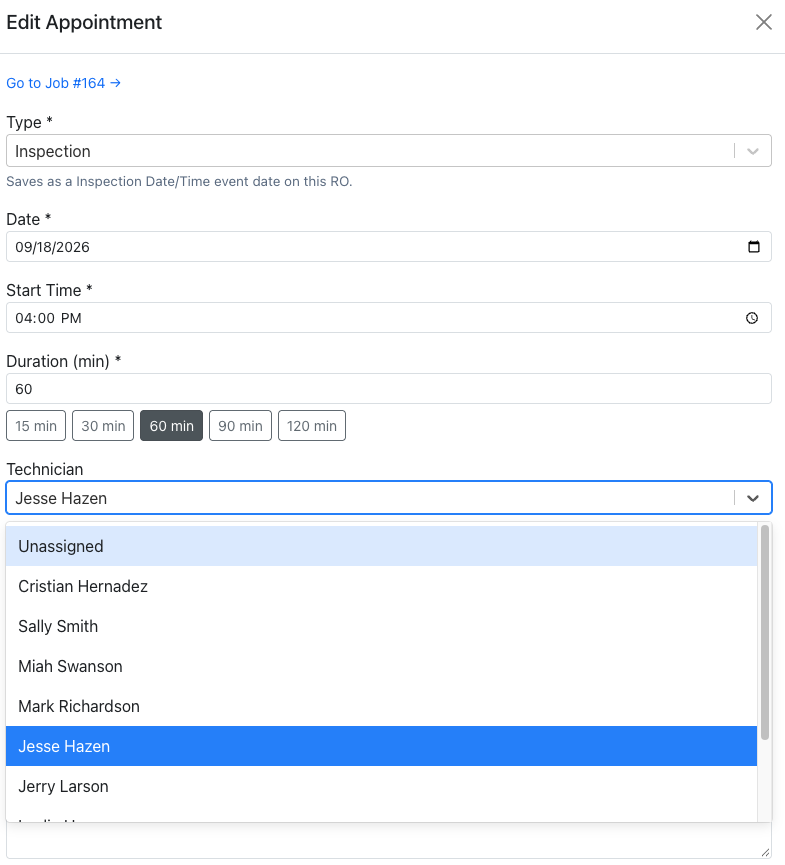
Click any appointment on the calendar or in the job's appointment list to open the edit modal. Make your changes and save.
Use Delete Appointment at the bottom of the modal to remove it. A Go to Job link takes you directly to the linked repair order.
Appointment Types
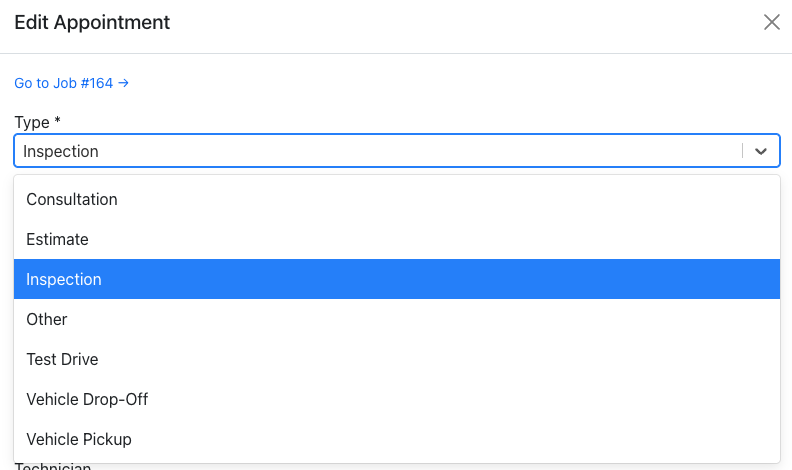
Preset categories help you organize appointments at a glance:
- Drop-Off
- Pickup
- Estimate
- Inspection
- Test Drive
- Consultation
- Other
Each type has a default duration and a color for easy identification on the calendar. Some types automatically create repair event dates on the job — for example, selecting "Drop-Off" creates a "drop_off" event date on the linked repair order.
Online booking vs. internal use: Drop-Off and Pickup are internal workflow stages — you use them when scheduling on a job, but customers don't see them on the public booking page. The customer-facing booking page offers Estimate, Inspection, Test Drive, Consultation, and Other, so people only pick the kinds of visits that make sense to request themselves.
Business Hours
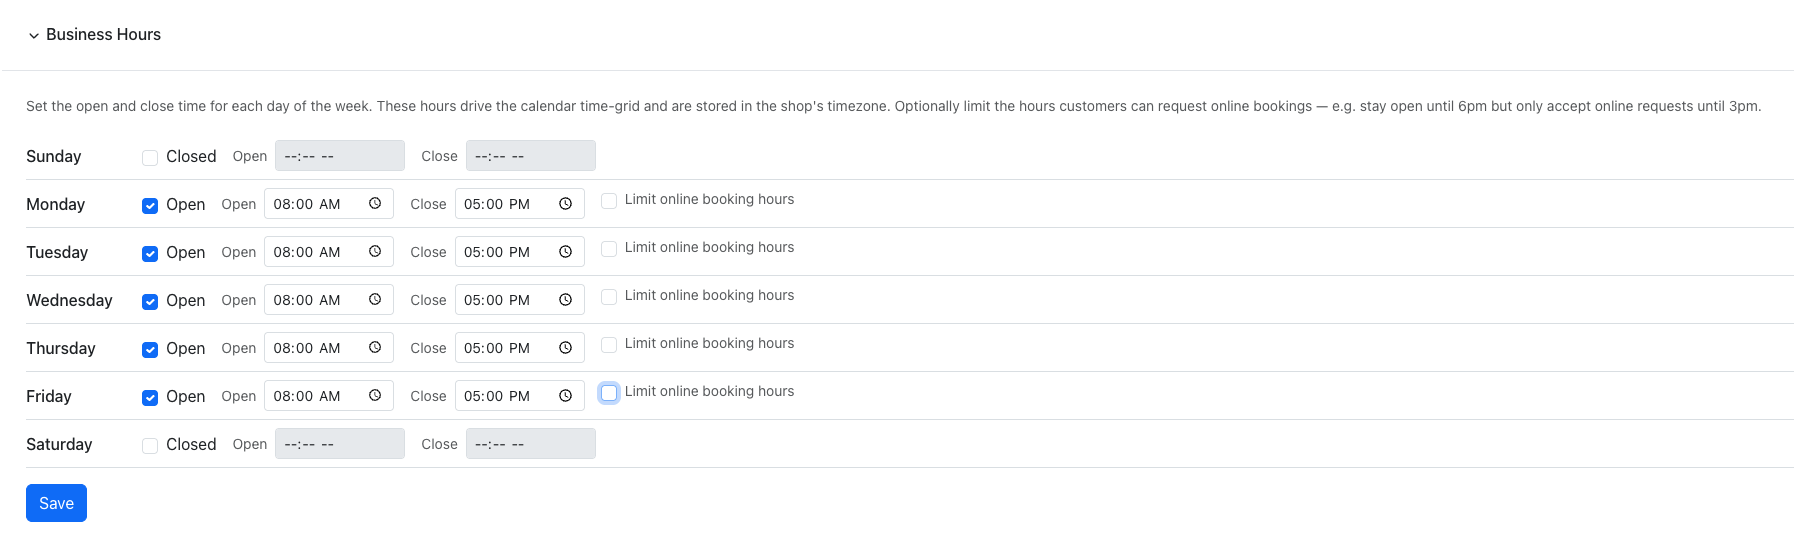
Set your shop's operating hours in Company Settings → Business Hours. Define open and close times for each day of the week.
The calendar grid clips to these hours so you only see your working day. Days marked as closed show a "Shop closed" indicator instead of time slots.
Appointment Tags
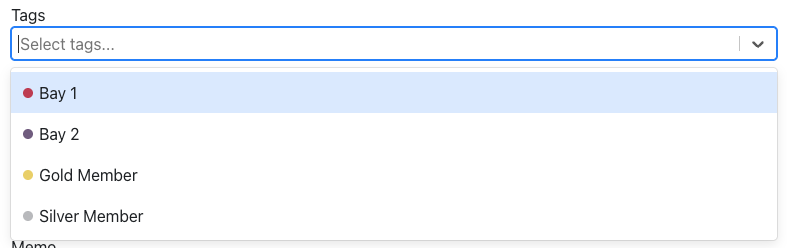
Manage tags in Company Settings → Appointment Tags. Tags like "Bay 1", "Loaner Required", or "Gold Member" can be attached to appointments for filtering and organization.
Each tag has a color and sort order. Use them to quickly identify appointment characteristics on the calendar.
Services
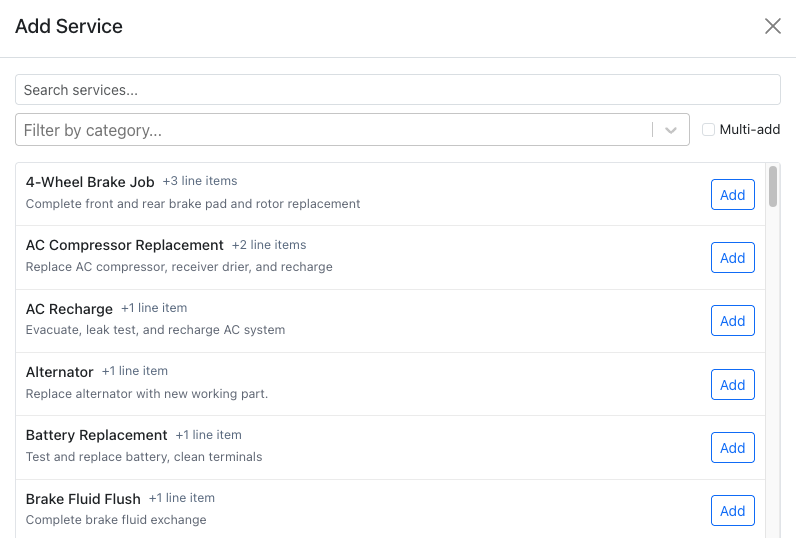
Attach service templates to appointments so you know what work is planned. Use the Service Picker to search and add services, then drag to reorder them.
The service count shows on the calendar card, giving you a quick sense of the scope of each appointment.
Filtering & Views
Use the toolbar multi-selects to filter by Technician, Type, or Tags. Combine filters to drill down to exactly the appointments you need.
The List view shows the next 30 days grouped by date — useful for a quick overview of upcoming work. All filters are persisted across page reloads so your preferred view stays intact.
Technician Assignment
Assign a technician from the Technician dropdown when creating or editing an appointment. When a technician is assigned, the system checks for scheduling overlaps with that technician's other appointments and displays a conflict warning if there's a time overlap.
Online Booking (Overview)
Online booking lets your customers request appointments themselves from a page you can share or embed on your website. Requests come into your calendar for you to review and confirm — nothing lands on your schedule without your approval.
The flow at a glance:
- You generate a booking link (and optional embed widget) once.
- A customer picks a service and an open time, and submits their details.
- The request appears in your calendar as a pending request.
- You confirm it onto the schedule (or decline it).
- Optionally, you create a job from the request, pulling the customer and vehicle details over.
Booking Link & Widget
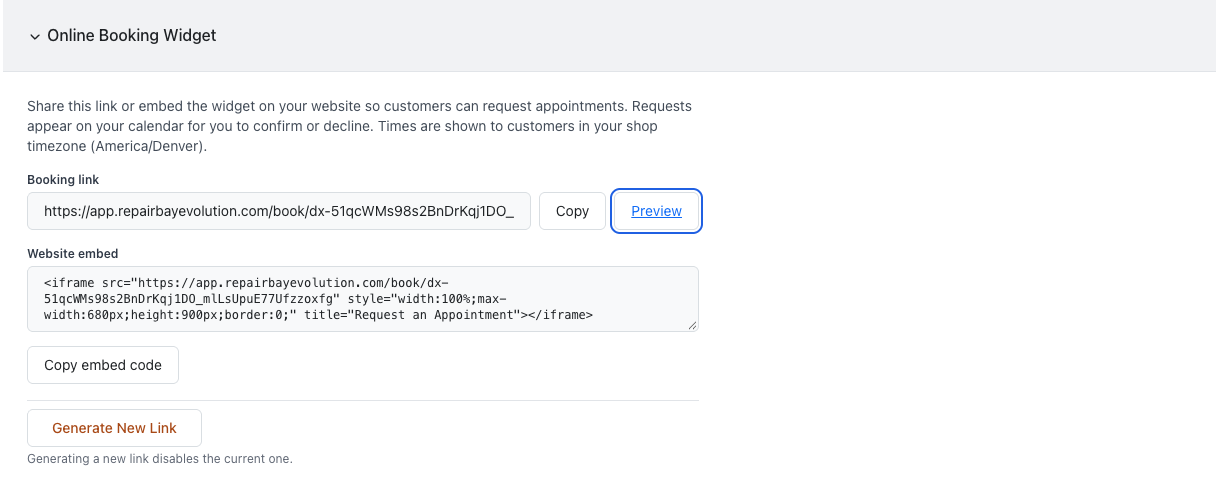
Go to Company Settings → Online Booking Widget and click Generate Booking Link. This creates a unique, private link to your shop's booking page.
From there you can:
- Copy the booking link — share it in emails, texts, a "Book Now" button, or a QR code.
- Copy the embed code — paste the provided snippet into your own website to show the booking form inline.
- Preview — open your live booking page to see what customers see.
- Generate a new link — if a link is ever shared too widely, generate a new one. The old link stops working immediately, so update any embeds afterward.
Booking Settings
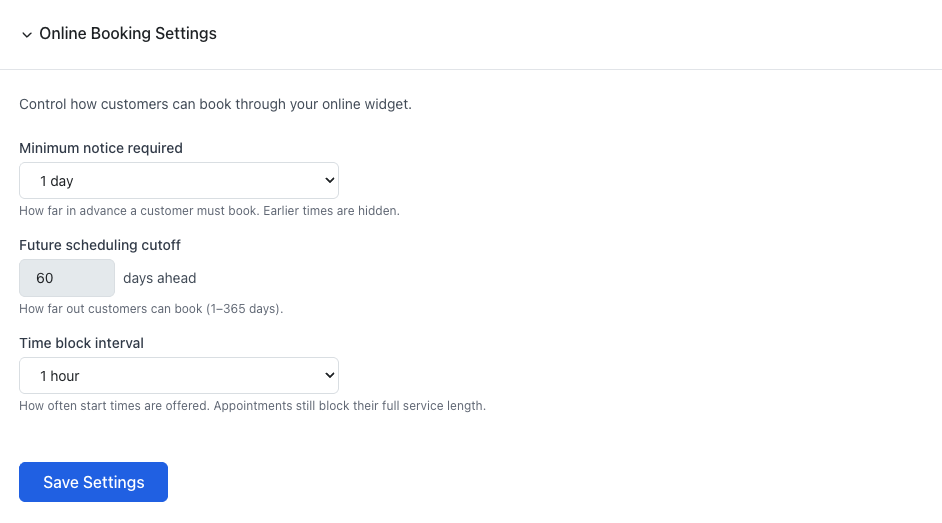
Control how customers can book under Company Settings → Online Booking Settings:
- Minimum notice required — how far in advance a customer must book. Earlier times are hidden (e.g. "at least 2 hours ahead").
- Future scheduling cutoff — how far out customers may book, in days (1–365).
- Time block interval — how often start times are offered (e.g. every 30 minutes). This only controls the spacing of offered times; each appointment still blocks its full service length.
Online Booking Hours
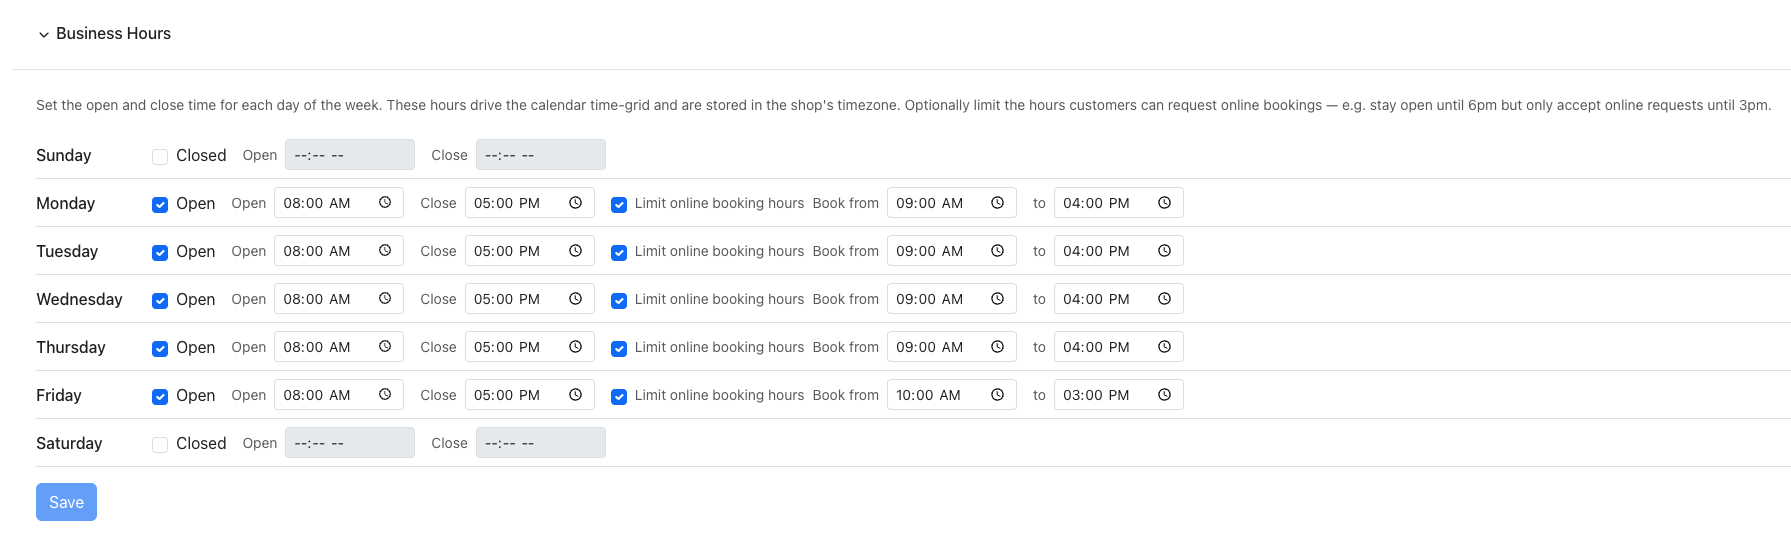
You can let customers book during only part of your open day. In Company Settings → Business Hours, each open day has a "Limit online booking hours" option. When turned on, you set a separate book from / to window for that day.
For example, your shop might be open until 6:00 PM but only accept online requests until 3:00 PM — keeping the end of the day under your manual control. If you don't limit the hours, customers can request any time within your business hours.
Online booking hours must fall within your business hours for that day.
The Customer's Experience
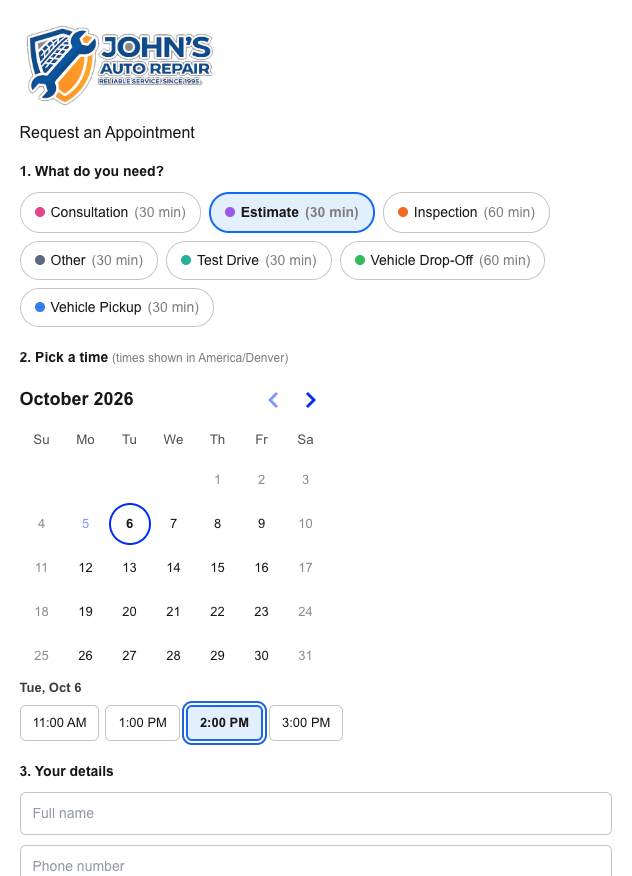
On your booking page, a customer:
- Chooses what they need from the services you offer online (for example Estimate, Inspection, Test Drive, Consultation, or Other — internal types like Drop-Off and Pickup aren't shown).
- Picks a day on the calendar — only days with openings are selectable; fully-booked or closed days are greyed out.
- Picks an available time for that day (shown in your shop's timezone).
- Enters their name, a phone number or email, and optionally their vehicle (year/make/model) and a note.
If your schedule is completely full for the booking window, the page tells the customer to contact the shop directly rather than showing an empty calendar.
Reviewing Requests
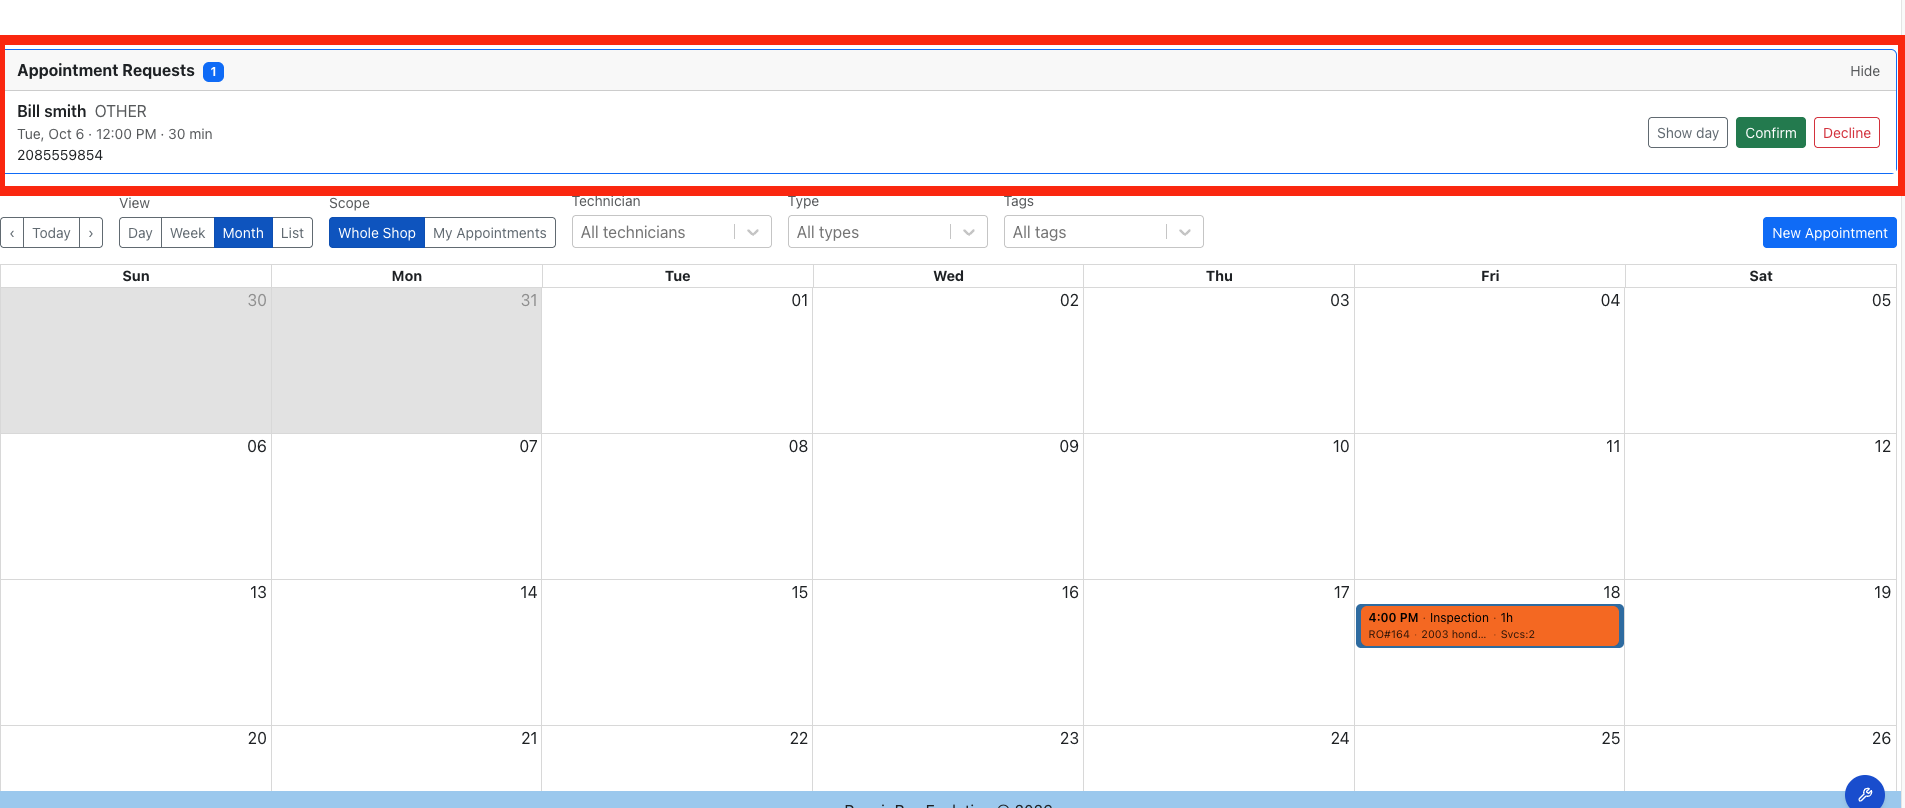
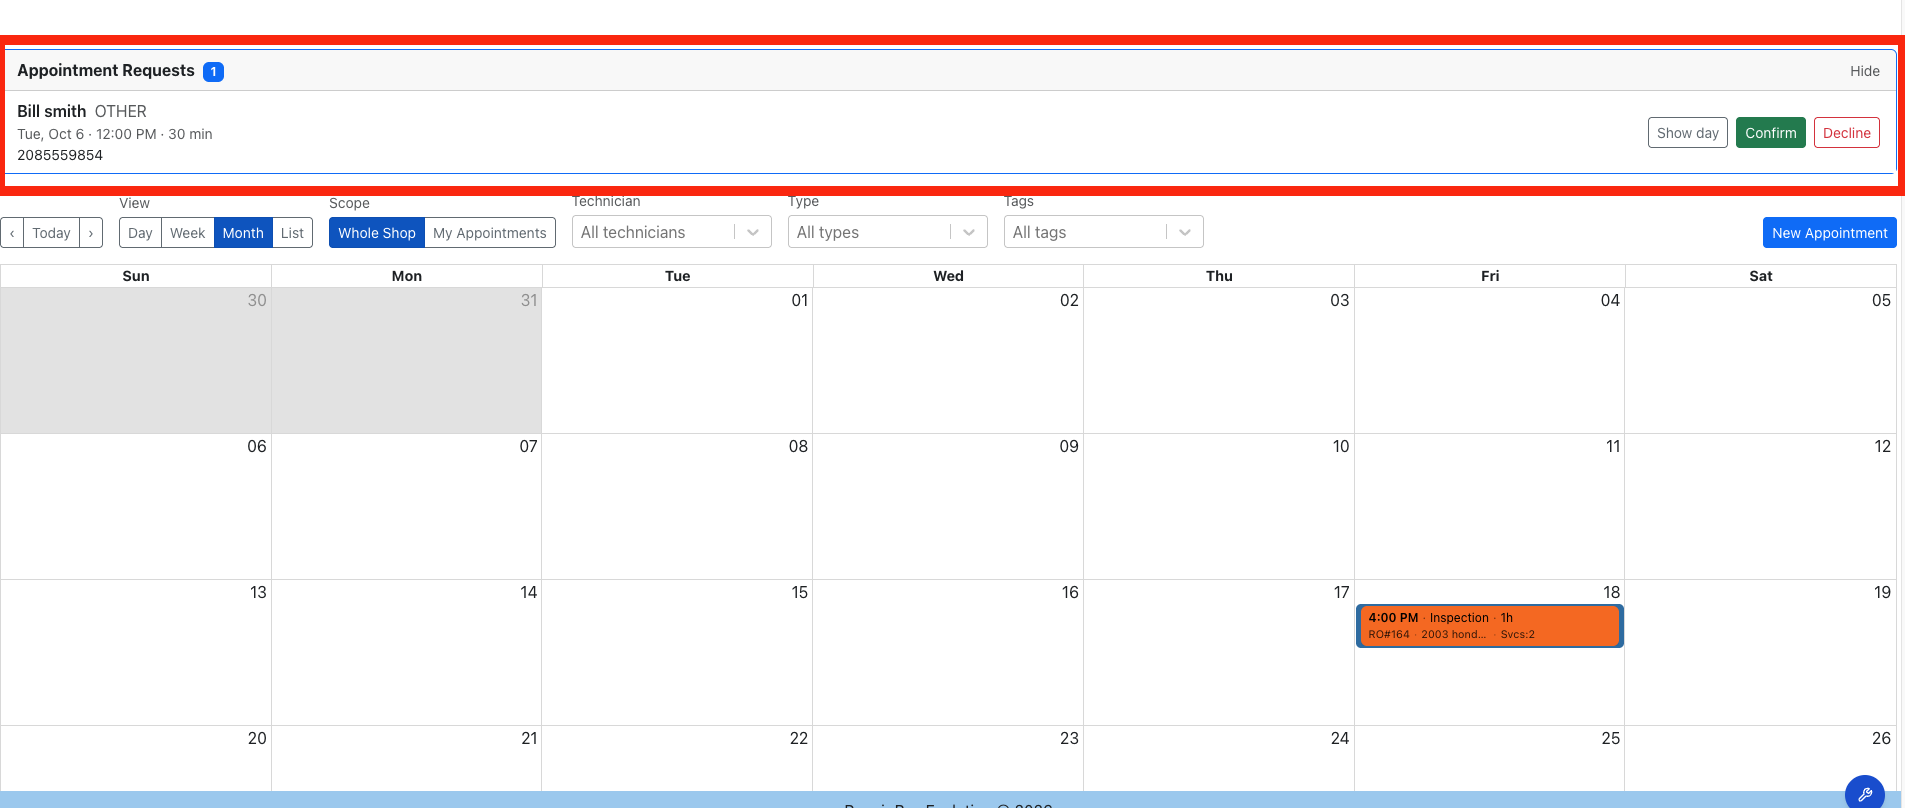
Incoming requests appear in an Appointment Requests panel at the top of your Calendar page, with a count of how many are waiting. For each request you can:
- Show day — jump the calendar to that day so you can see how full it already is before deciding.
- Confirm — accept the request. It becomes a confirmed appointment on your schedule.
- Decline — reject the request and free the time back up.
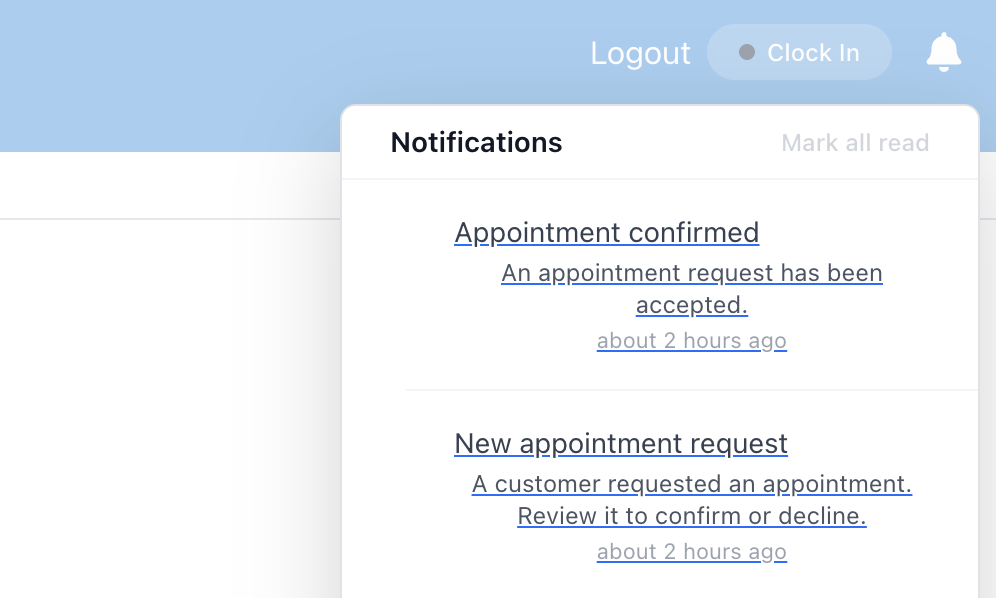
A confirmed request shows the customer's details right on the appointment so you know who's coming in. You'll also get an email notification when a new request arrives.
Creating a Job from a Request
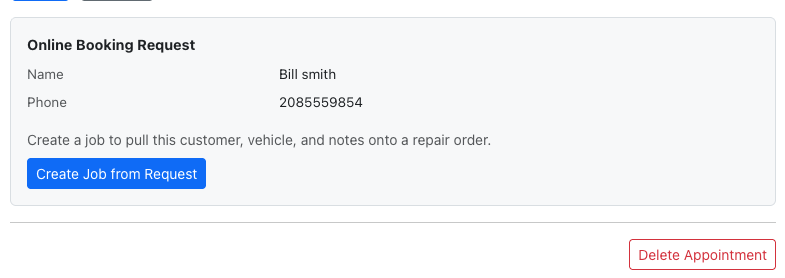
When you open a booking request's appointment, you'll see the customer's submitted details (name, contact, vehicle, and notes). If the appointment isn't tied to a job yet, click Create Job from Request to spin up a repair order and link it to the appointment.
Once a job exists, you can pull the request's details onto it with the quick-add tools, each pre-filled from what the customer submitted:
- Contact — the customer's name (split into first/last for you to confirm), phone, and email.
- Vehicle — a best guess at year/make/model from what they typed, for you to adjust.
- Concern — their notes, ready to save as the first concern on the job.
You review and correct each piece before saving, so unverified customer input never lands on a job without a quick human check.
Confirmations & Reminders
When you confirm a customer's booking request, the system can automatically send them a confirmation message so they know they're on the schedule — no manual step on your end. As the appointment approaches, it can also send reminders.
Messages go out by text or email, depending on what the customer gave you and what they agreed to:
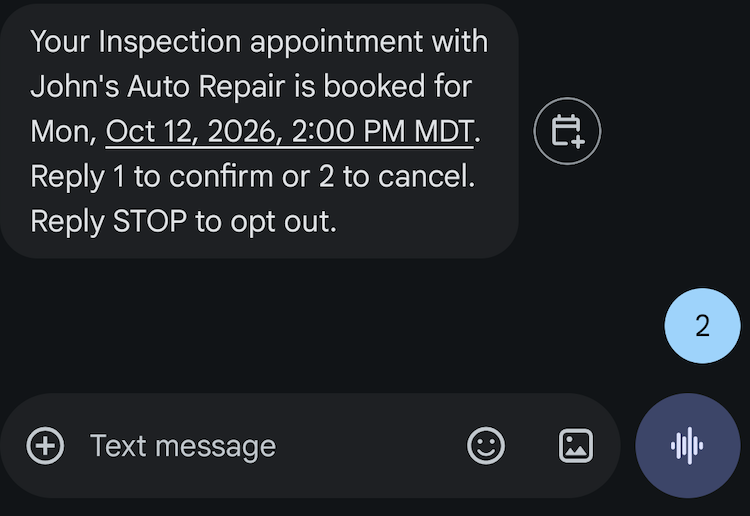
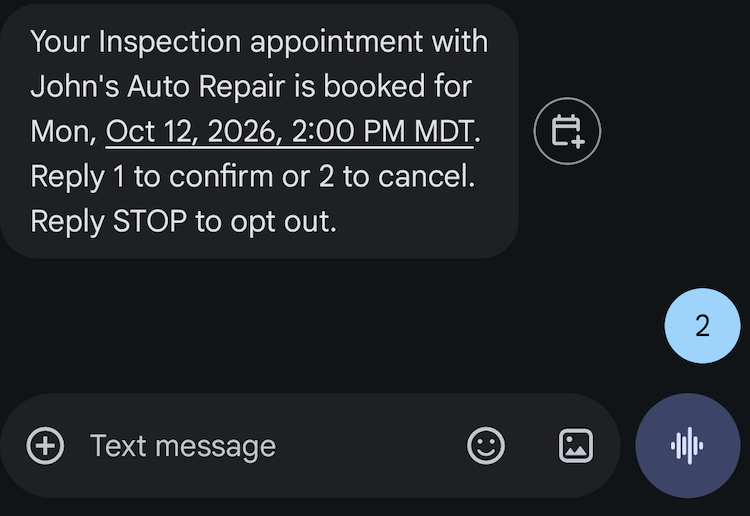
- Text (SMS) — used when the customer provided a mobile number and checked the consent box on the booking form (see below). The text names the service and date, for example: "Your Vehicle Drop-Off appointment with [Your Shop] is booked for Wed, Oct 8, 1:00 PM."
- Email — used when a text can't be sent (no mobile number or no SMS consent) but the customer left an email address.
Your shop name appears in the message so customers immediately recognize who it's from.
The SMS consent checkbox
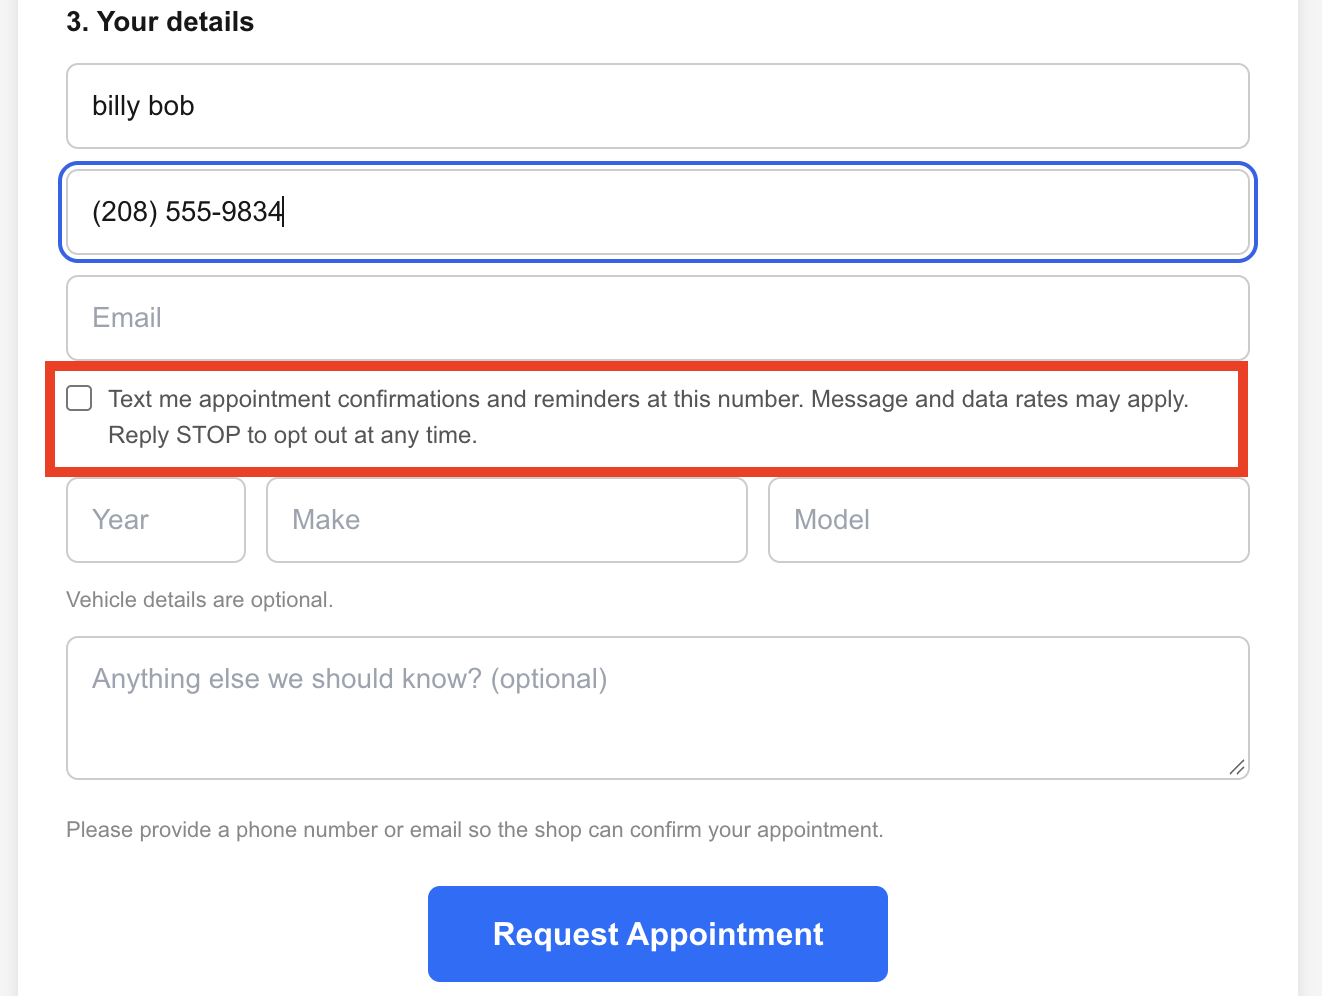
On your booking page, once a customer enters a phone number they'll see an opt-in checkbox: "Text me appointment confirmations and reminders at this number. Message and data rates may apply. Reply STOP to opt out at any time."
Texting only happens when the customer checks that box — it's unchecked by default. If they leave it unchecked (or don't give a phone number), the shop can still reach them by email instead. This keeps your messaging compliant: customers always opt in to texts explicitly, and can reply STOP at any time to opt back out.
Customer Replies (Confirm / Cancel)
Confirmation and reminder messages invite the customer to respond, so they can confirm or cancel without calling in:
- By text — the customer replies 1 to confirm or 2 to cancel.
- By email — the message includes Confirm and Cancel buttons that open a simple one-tap page.
Either way, the result flows straight onto your calendar:
- Confirm marks the appointment Confirmed.
- Cancel marks it Cancelled and stops any further reminders for it. Cancelled appointments drop off the calendar's default view (you can still find them by including cancelled appointments in your filters).
This works even for a brand-new booking request you haven't turned into a job yet — a customer can confirm or cancel the moment they get the message.
Note: if a customer has more than one upcoming appointment with you, a text reply applies to their soonest one. Email buttons always apply to the exact appointment the message was about.