Line Items
Overview
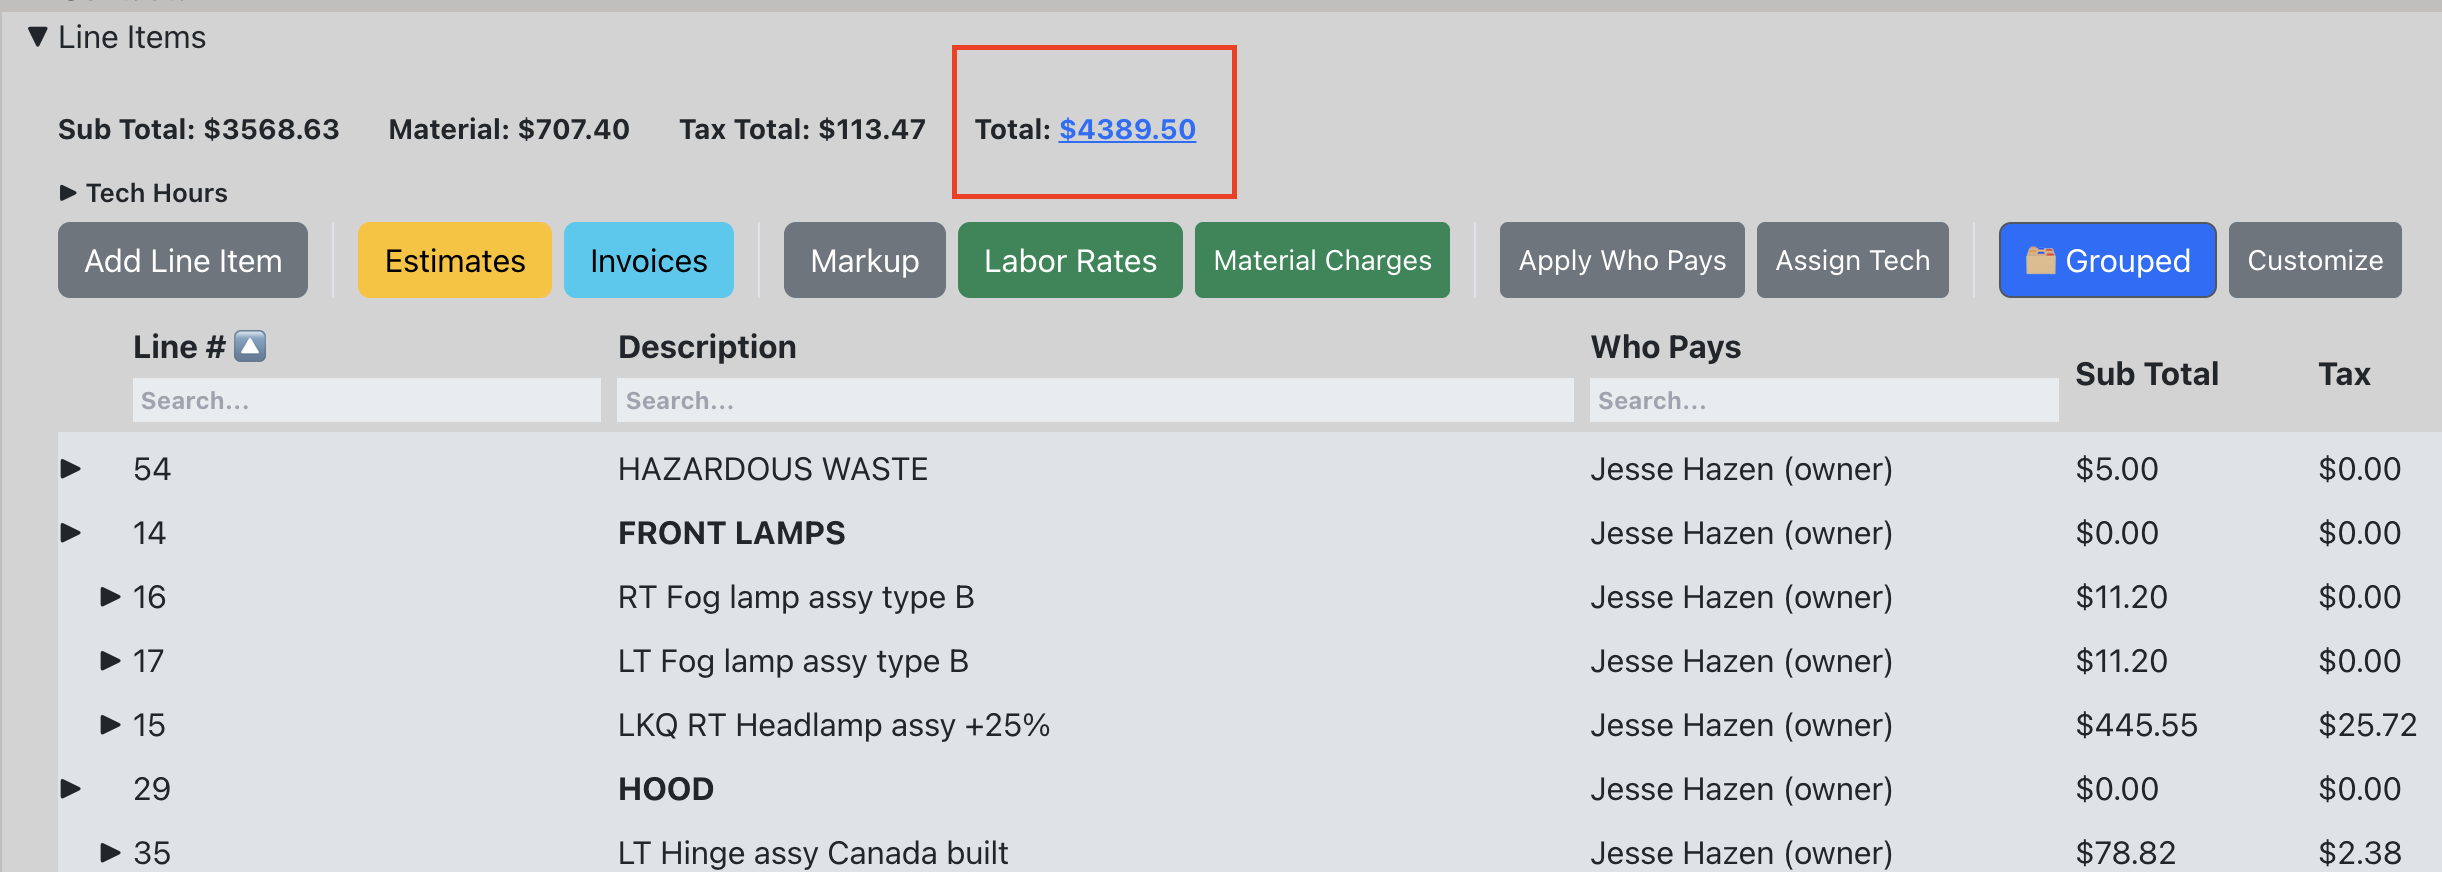
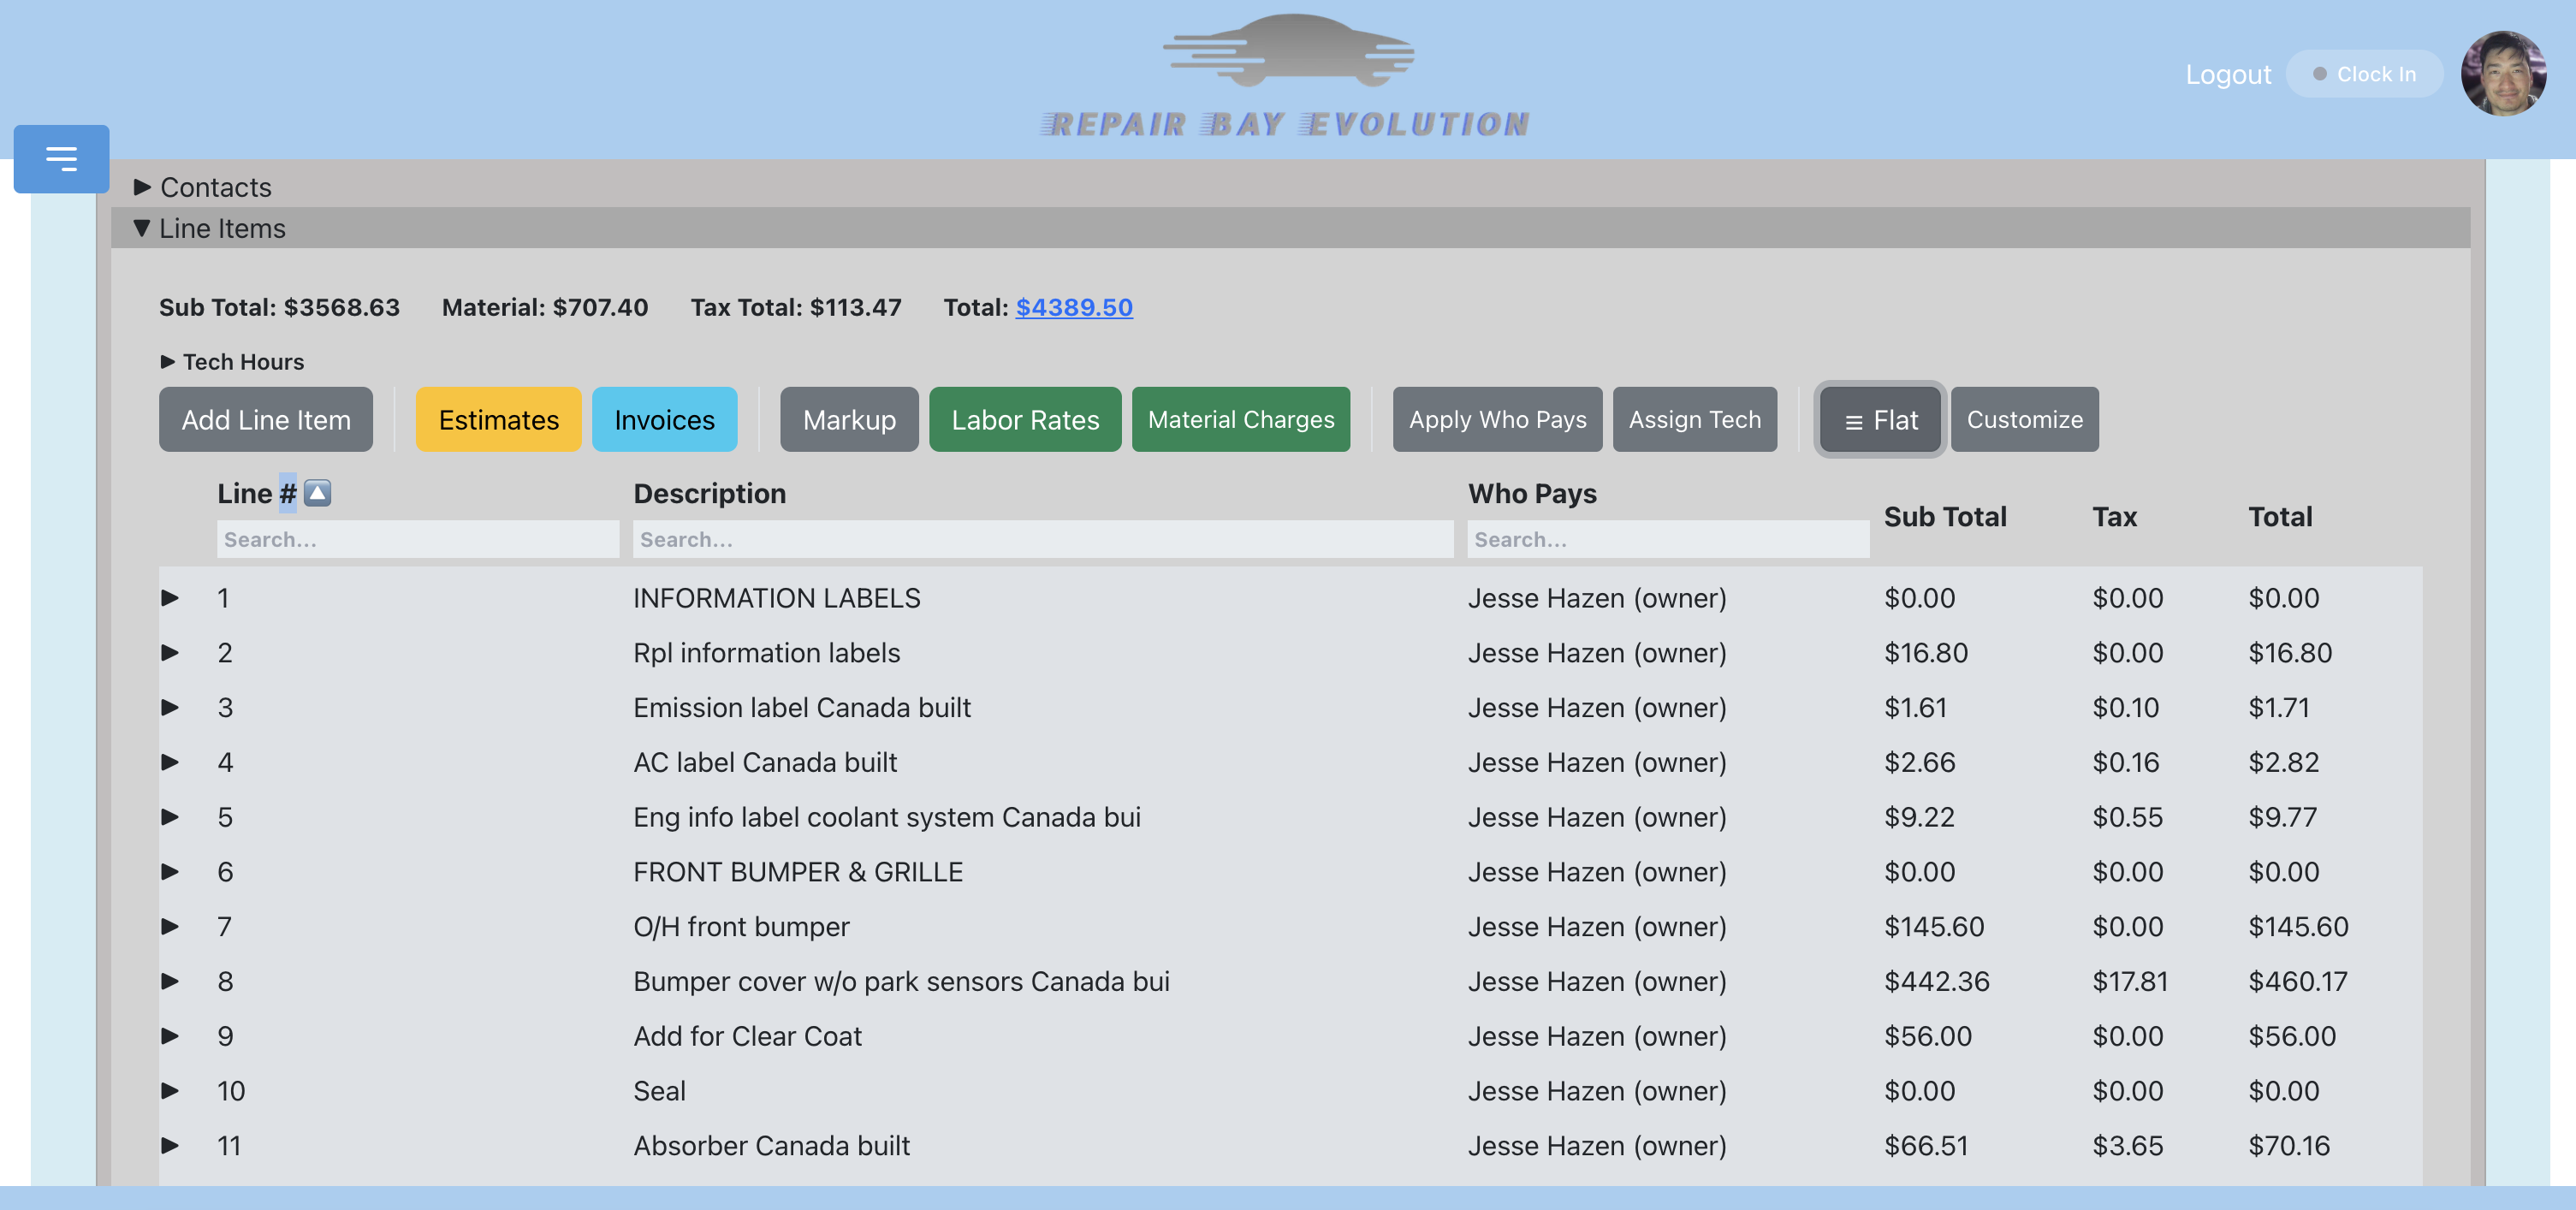
Line items are the core of a repair order. Each line item represents a repair operation and can contain parts, labor, and refinish labor sub-items. The line items view shows totals for sub total, tax, and grand total at the top. You can filter and sort columns, and expand any row to see its details.
Add Line Items
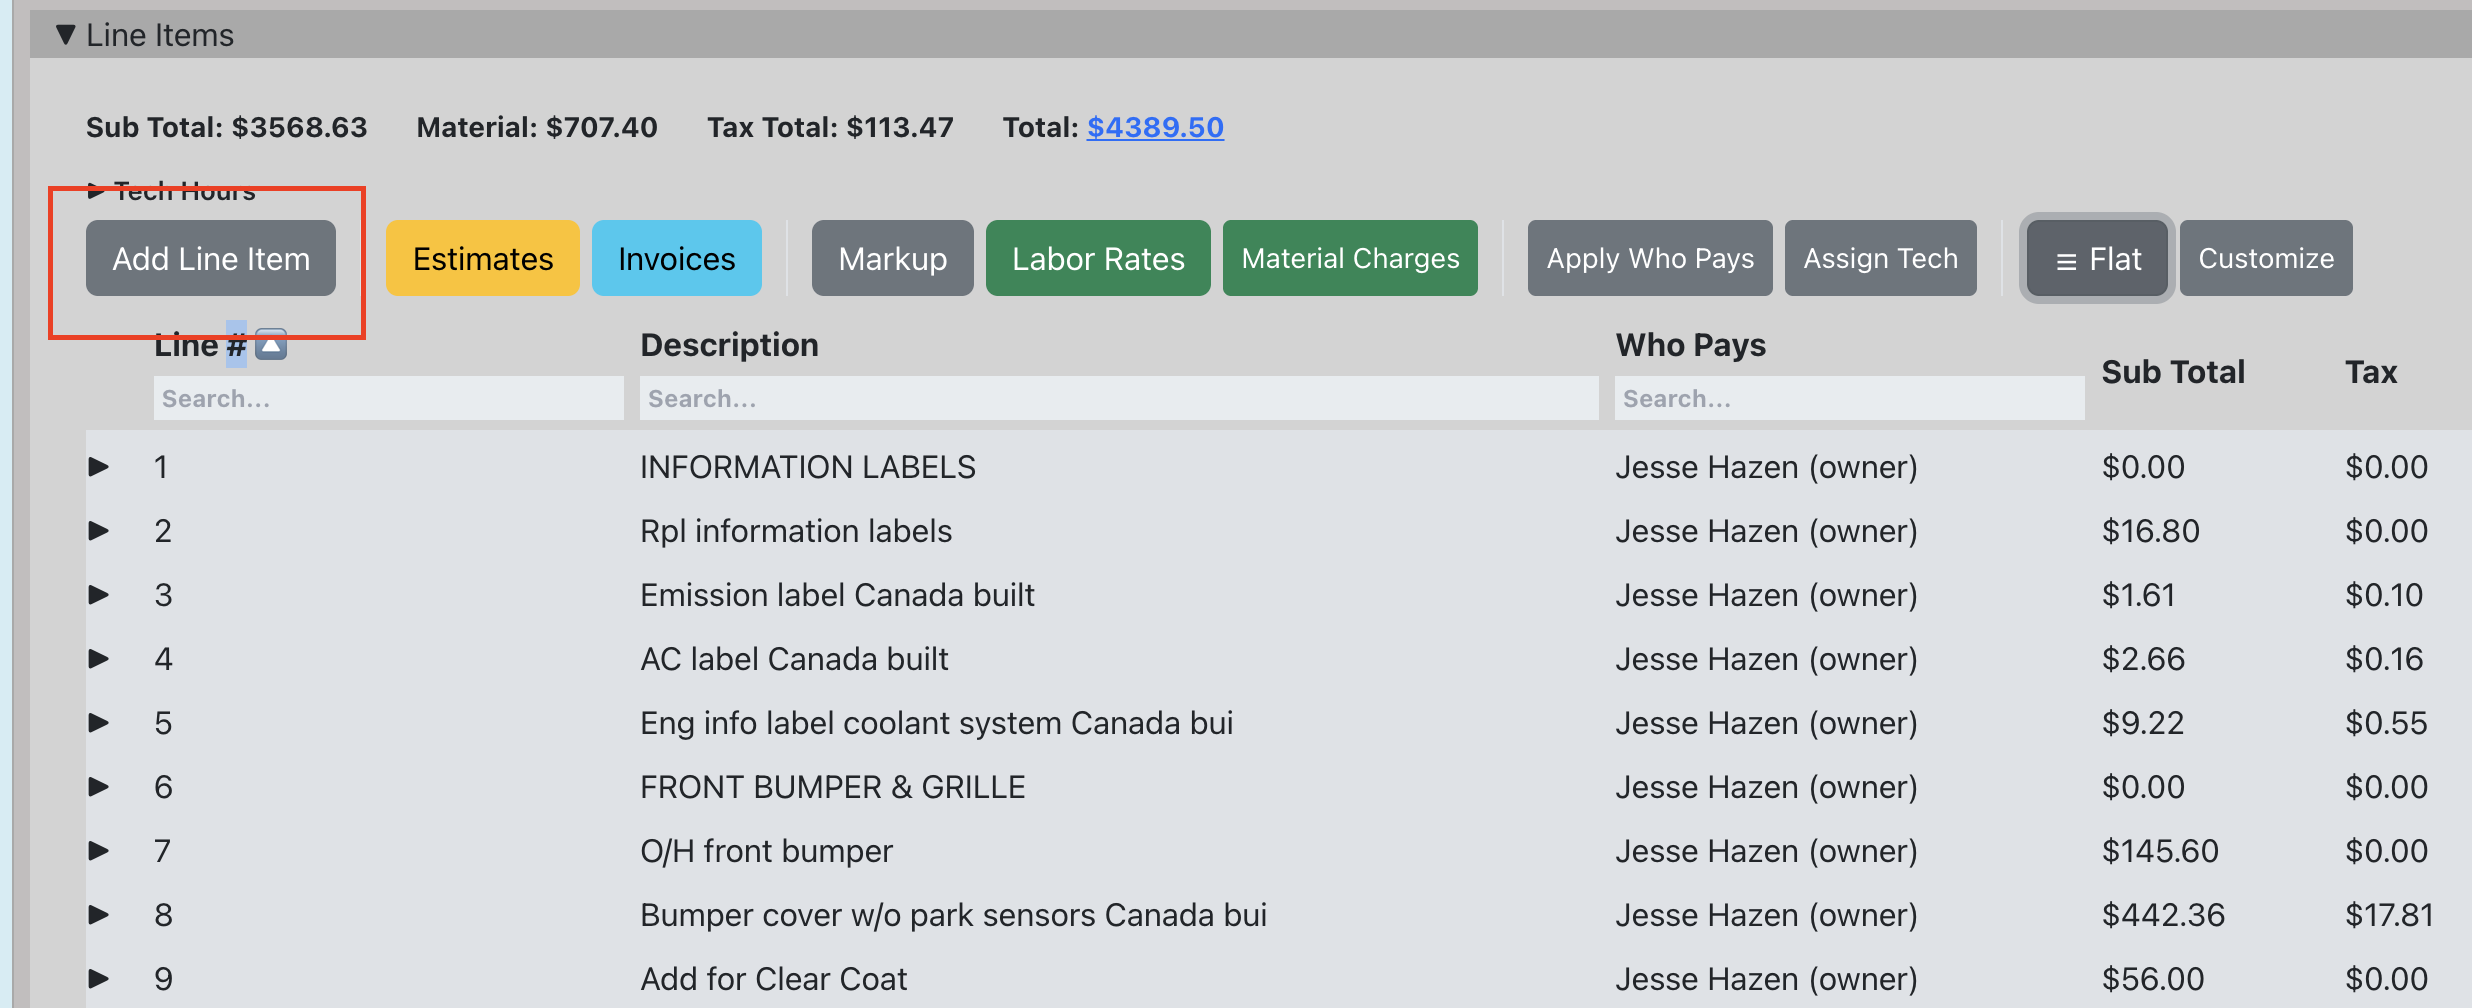
- Click on a job to open it.
- Navigate to the Line Items section.
- Click "Add Line Item".
- A new row appears. Click on it to expand and fill in details.
Service Templates
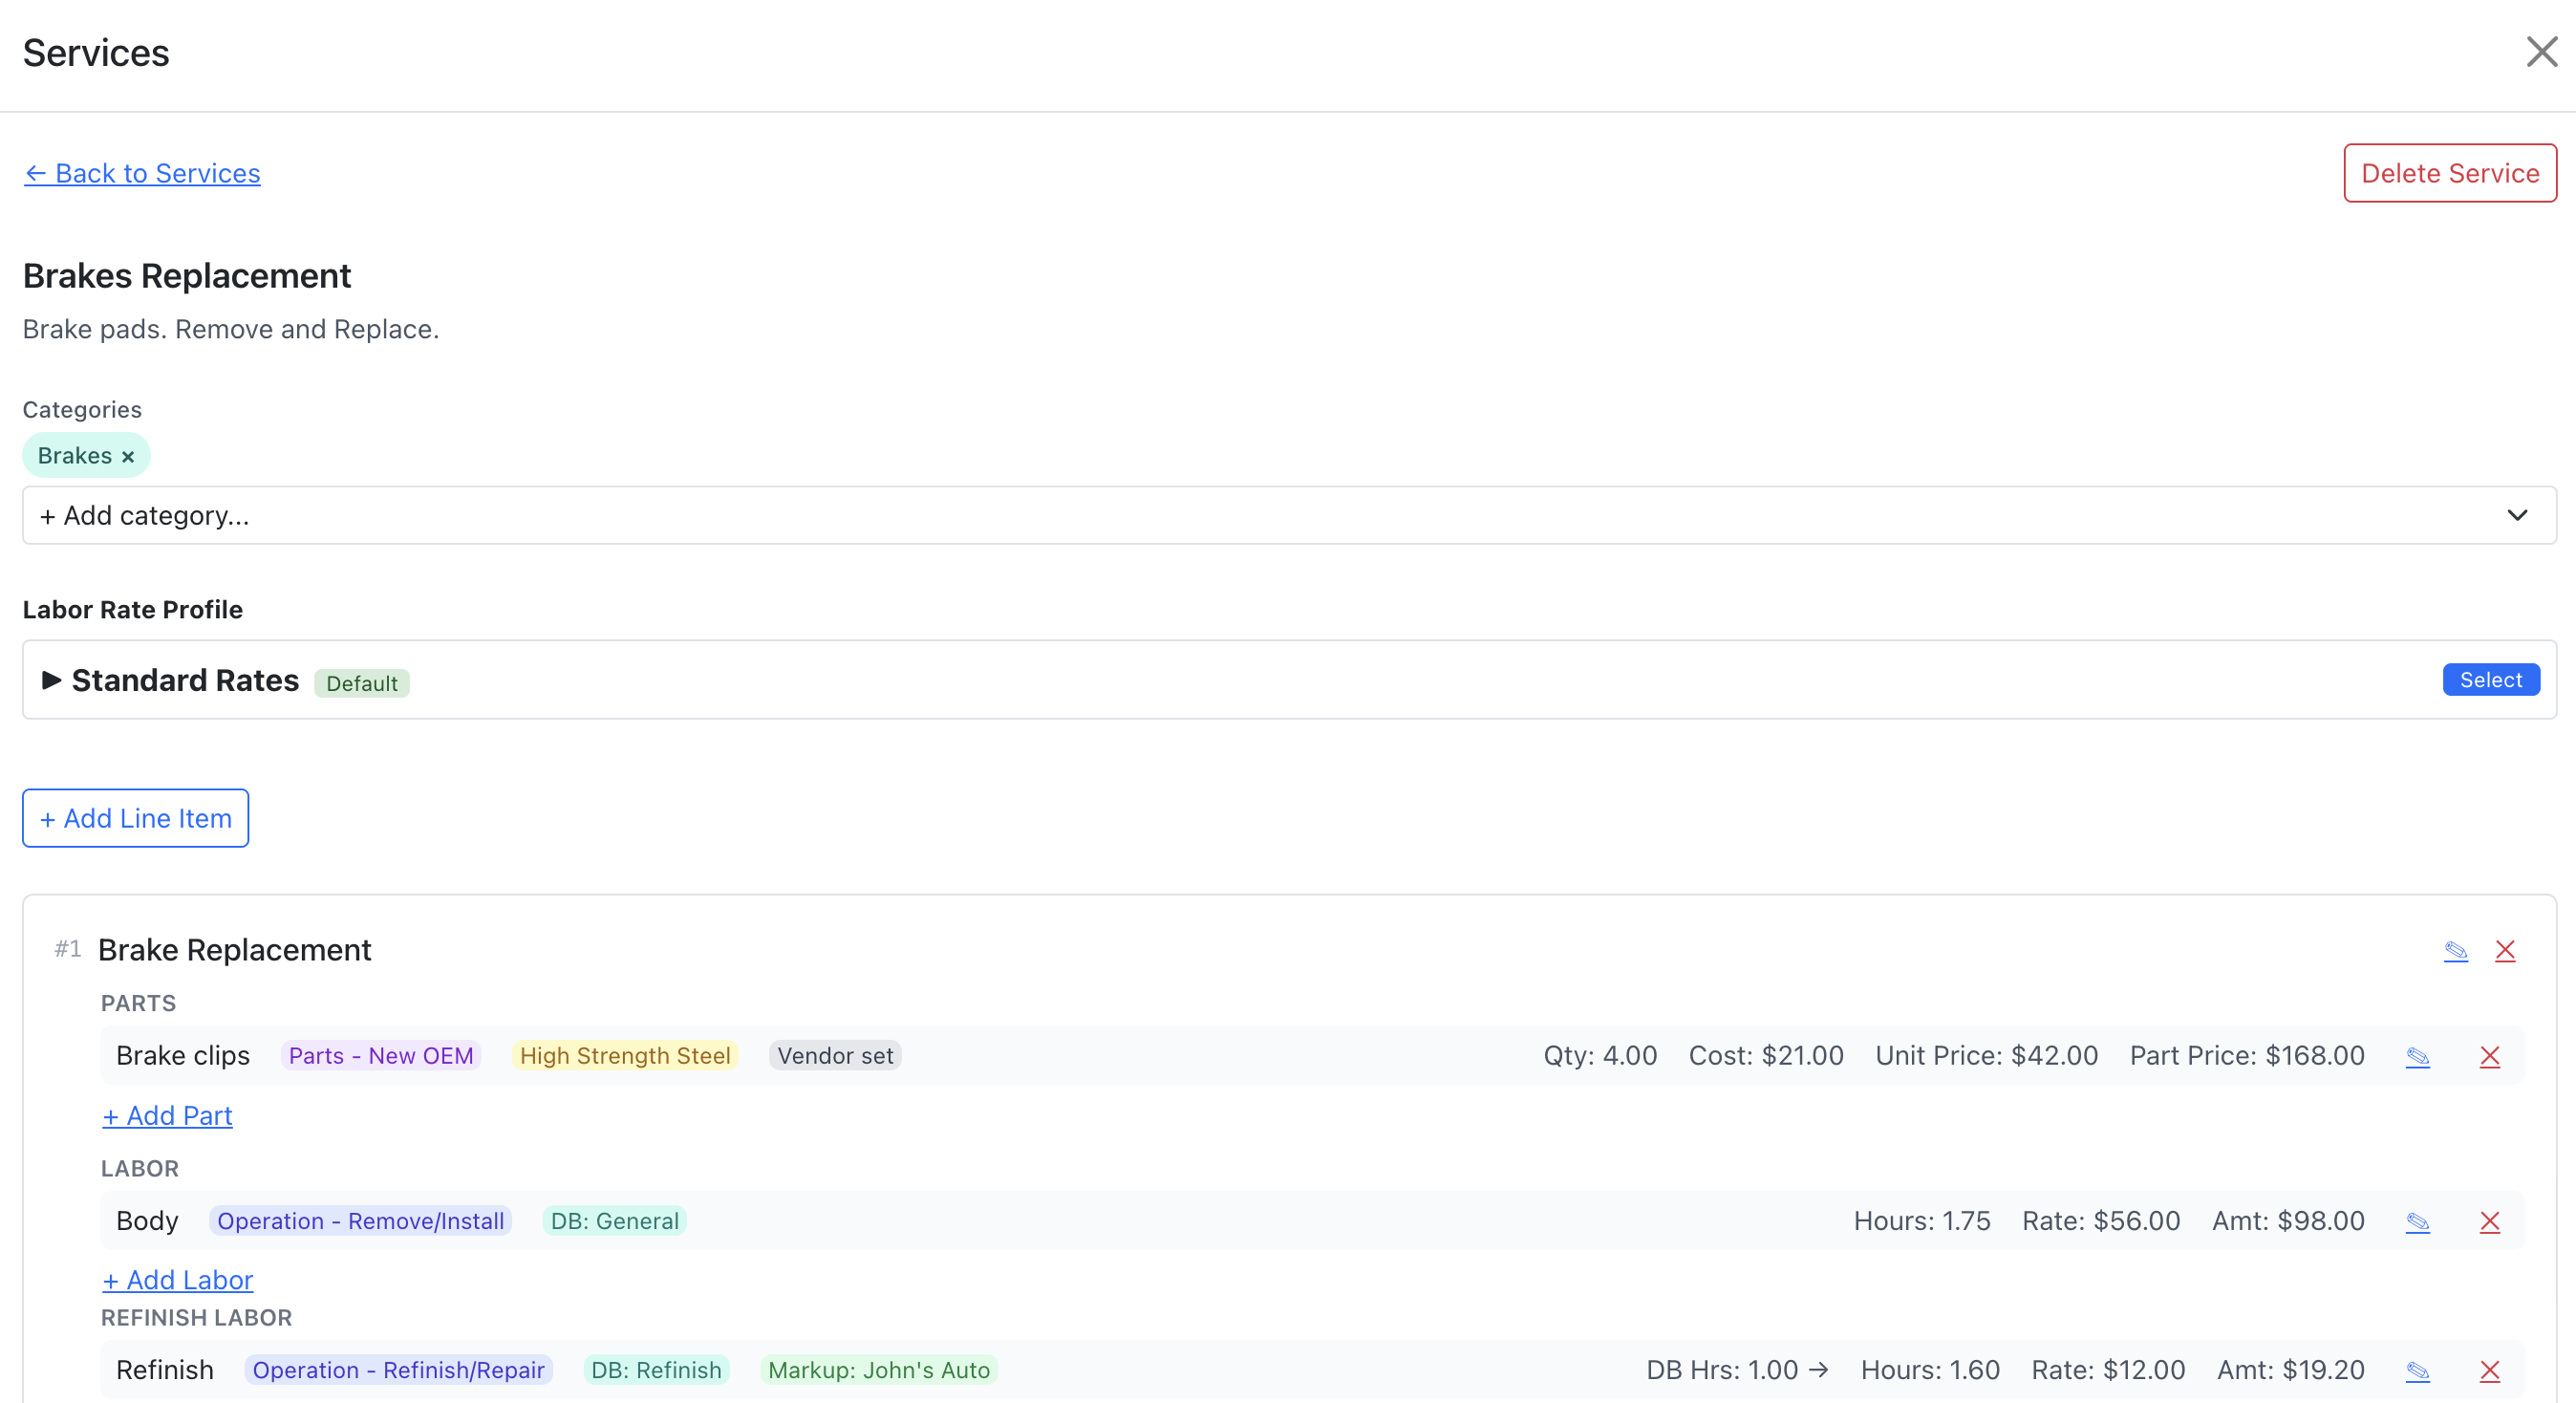
Service templates (canned jobs) let you apply pre-configured packages of line items, parts, and labor to a job with one click. You can also selectively apply only the portions you need, create templates from existing jobs, and edit templates to keep pricing current.
Click the "Services" button in the line items toolbar to open the services modal.
For the full guide covering browsing, applying, partial apply, creating, editing, and categories, see the dedicated Service Templates Guide.
Parts
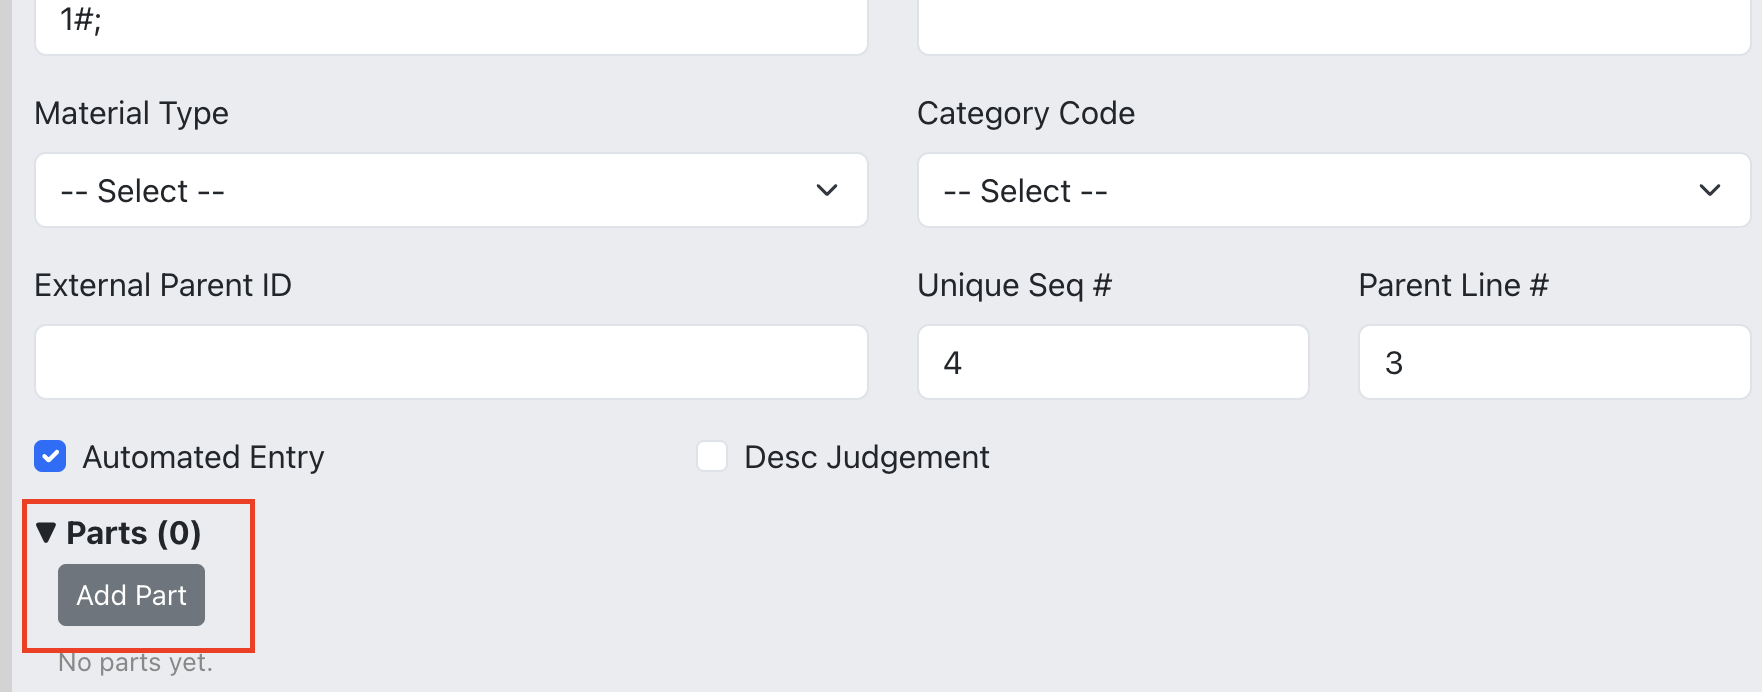
Each line item can have one or more parts. Parts track part type, number, description, cost, quantity, price, and taxable status.
- Expand a line item by clicking on it.
- In the Parts subsection, click "Add Part".
- Fill in the part details. The part price can be calculated automatically if a markup matrix is applied.
Part Statuses
Each part has a status that tracks its procurement lifecycle: Pending → Ordered → Received → Installed. Parts can also be Backordered, Fulfilled from Stock, or Returned. You can change statuses from the line items view or use the dedicated Parts Board for a Kanban-style workflow.
When a part is returned, you can set a negative return quantity to create a credit line on invoices. See Credit Lines and Refunds for details.
Labor
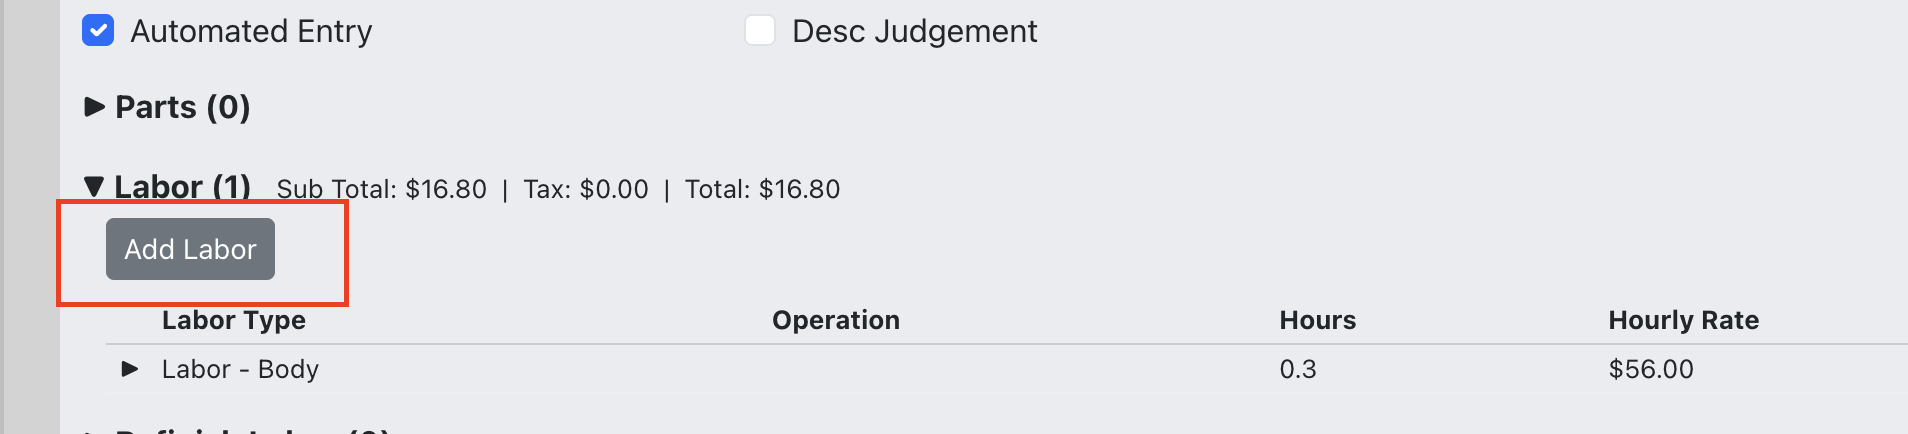
Each line item can have labor entries. Labor tracks the type (Body, Frame, Mechanical, etc.), hours, hourly rate, amount, assigned tech, and taxable status.
- Expand a line item.
- In the Labor subsection, click "Add Labor".
- Fill in the labor details. If a labor rate profile is applied to the job, the hourly rate will auto-populate.
Refinish Labor
Refinish labor works the same as body labor but is tracked separately for paint and refinish operations. This allows separate rate profiles and reporting.
- Expand a line item.
- In the Refinish Labor subsection, click "Add Refinish Labor".
- Fill in the details.

Markup Matrix
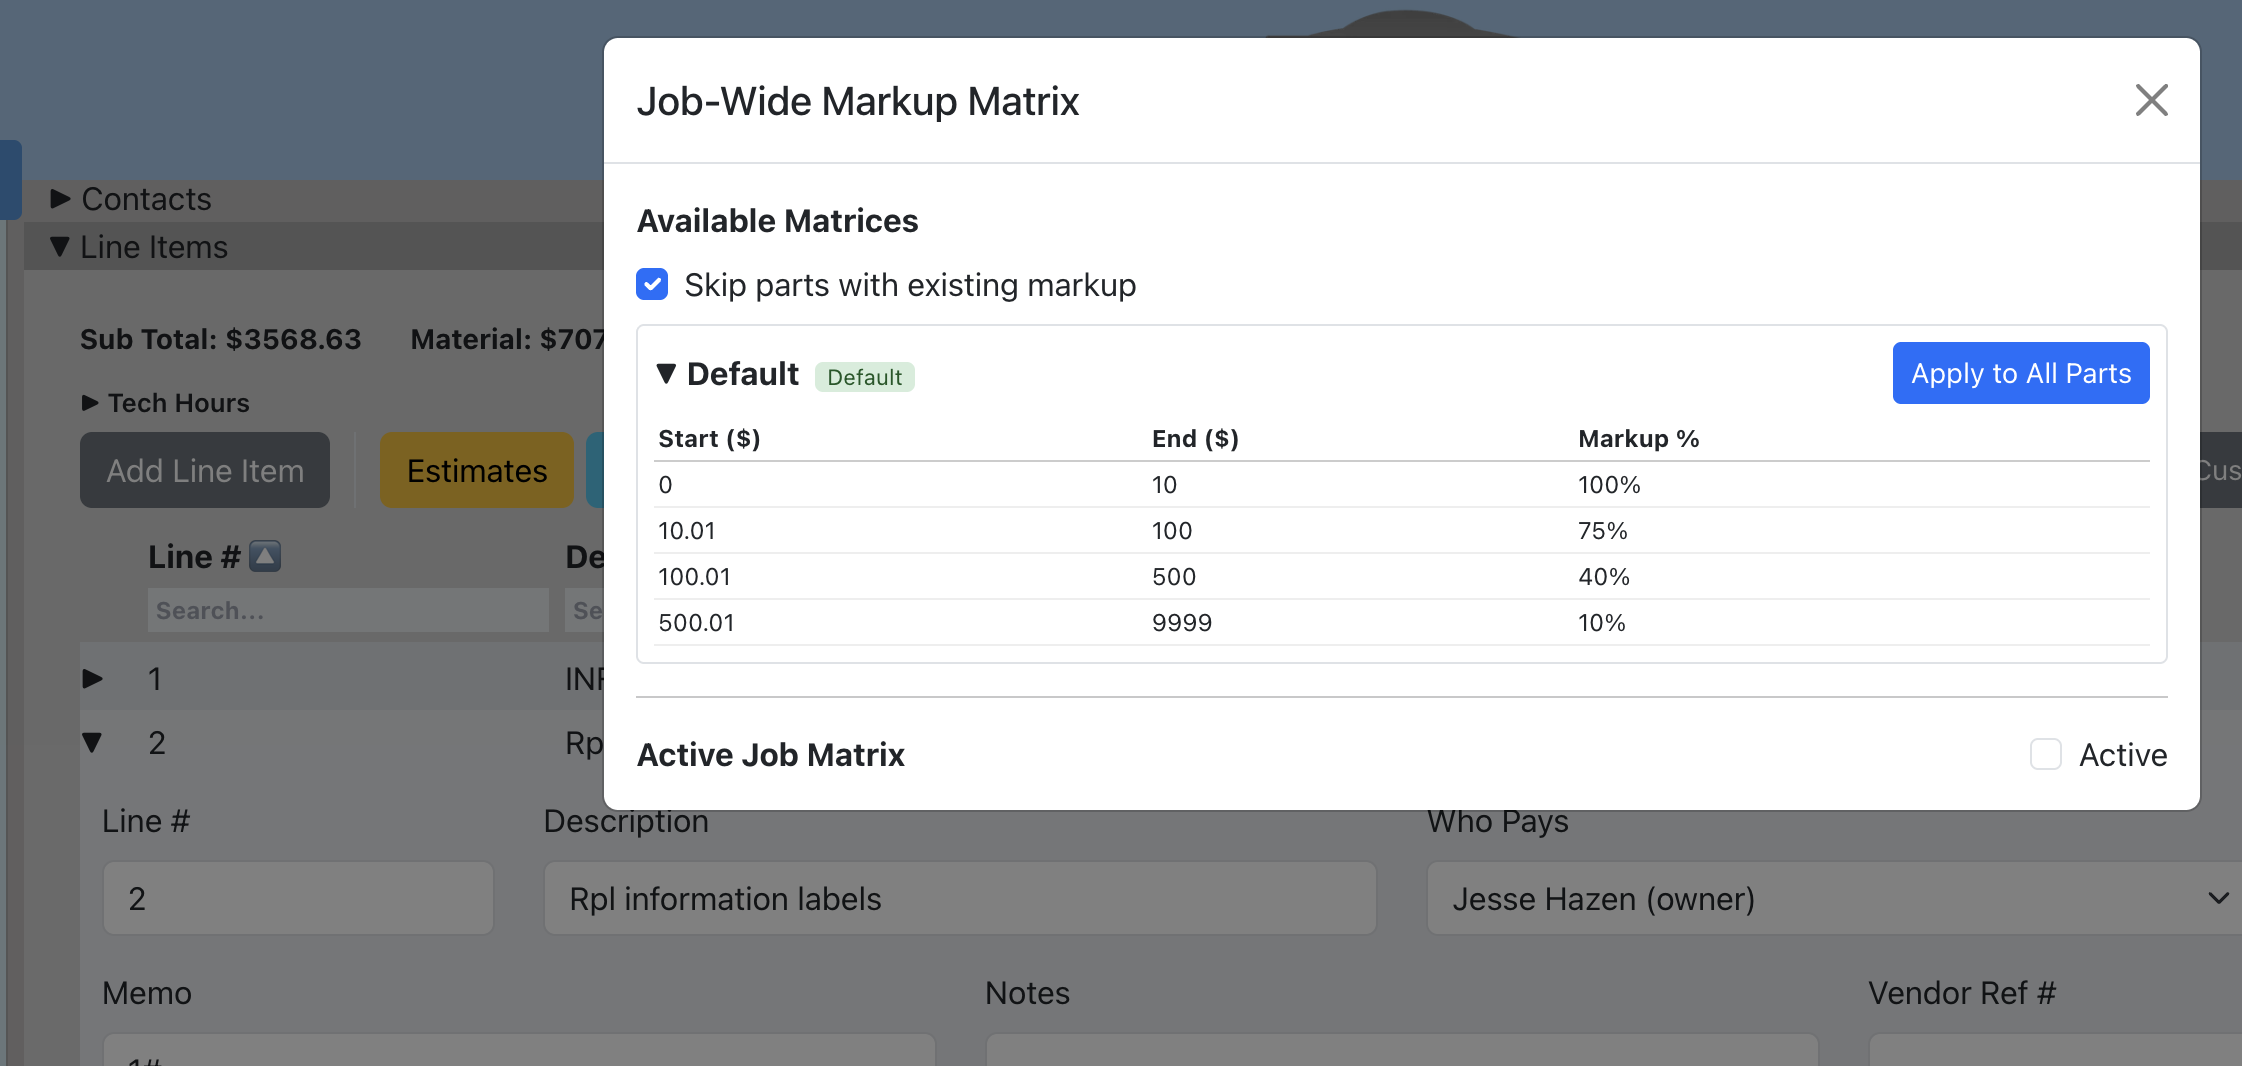
Overview: A markup matrix automatically calculates part prices based on cost ranges. When applied to a job, new parts will use the matrix, and you can apply it to all existing parts at once.
- In the line items button bar, click "Markup".
- Select a matrix from your company's saved matrices, or choose "None" to remove.
- Click "Apply" to update all parts on the job.
Labor Rate Profile
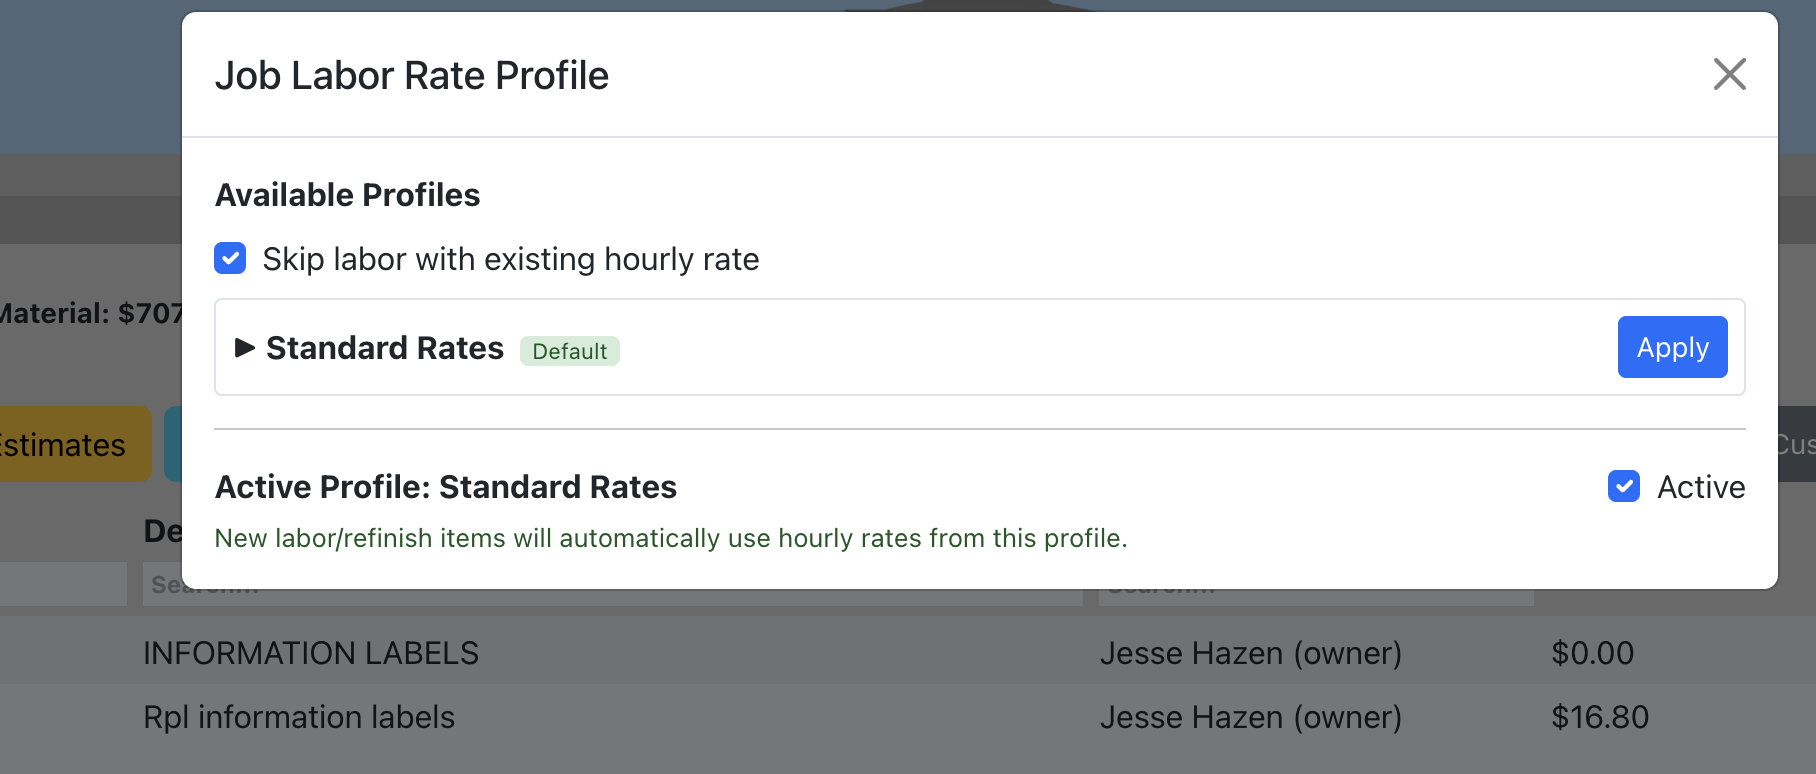
Overview: A labor rate profile sets hourly rates by labor type for the job. When applied, new labor entries auto-populate with the correct rate, and you can apply it to all existing labor at once.
- In the line items button bar, click "Labor Rates".
- Select a profile from your company's saved profiles.
- Click "Apply" to update all labor and refinish labor on the job.
Material Charges
Overview: Material charges add body supplies and paint supplies fees based on labor hours. Each can be enabled/disabled independently and marked as taxable. This helps you keep profitable by allowing invoicing to consider the little extra things that cost money.
- Click the "Material Charges" button in the line items button bar.
- Enable Body Supplies and/or Paint Supplies.
- Set the per-hour rate for each.
- Check "Taxable" if applicable.
- Click "Save". The charges will appear in the totals and summary.

Who Pays
Overview: Assign a responsible party (contact) to each line item. You can also bulk-apply "Who Pays" to all line items or to line items on a specific estimate.
Per Line Item
- Expand a line item.
- Select a contact from the "Who Pays" dropdown.
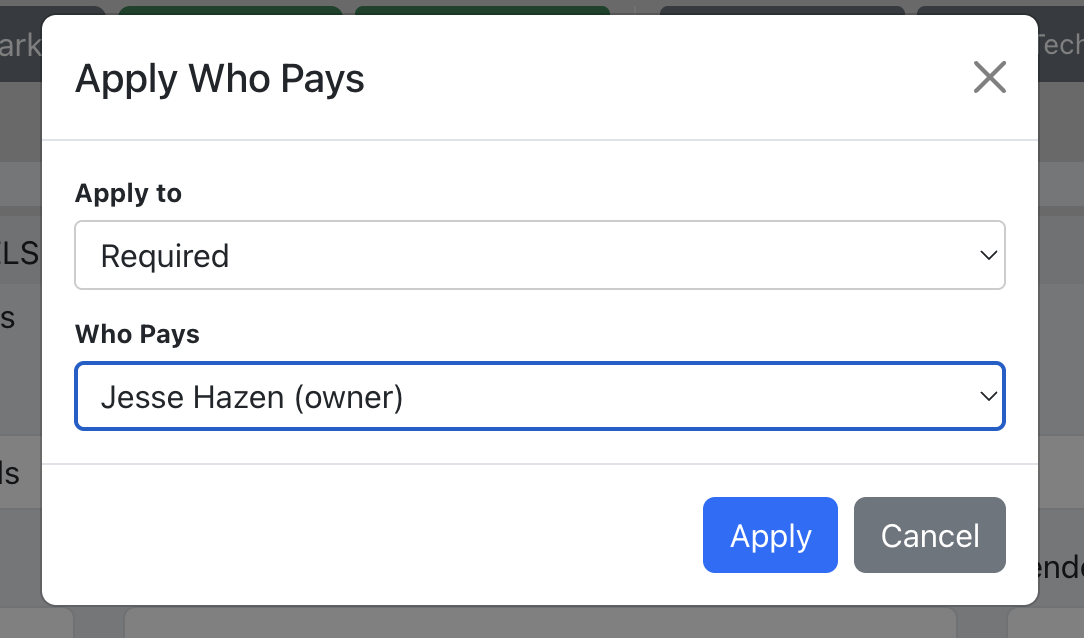
Bulk Apply
- Click "Apply Who Pays" in the button bar.
- Choose the scope: all line items or a specific estimate.
- Select the contact and click "Apply".
Assign Tech
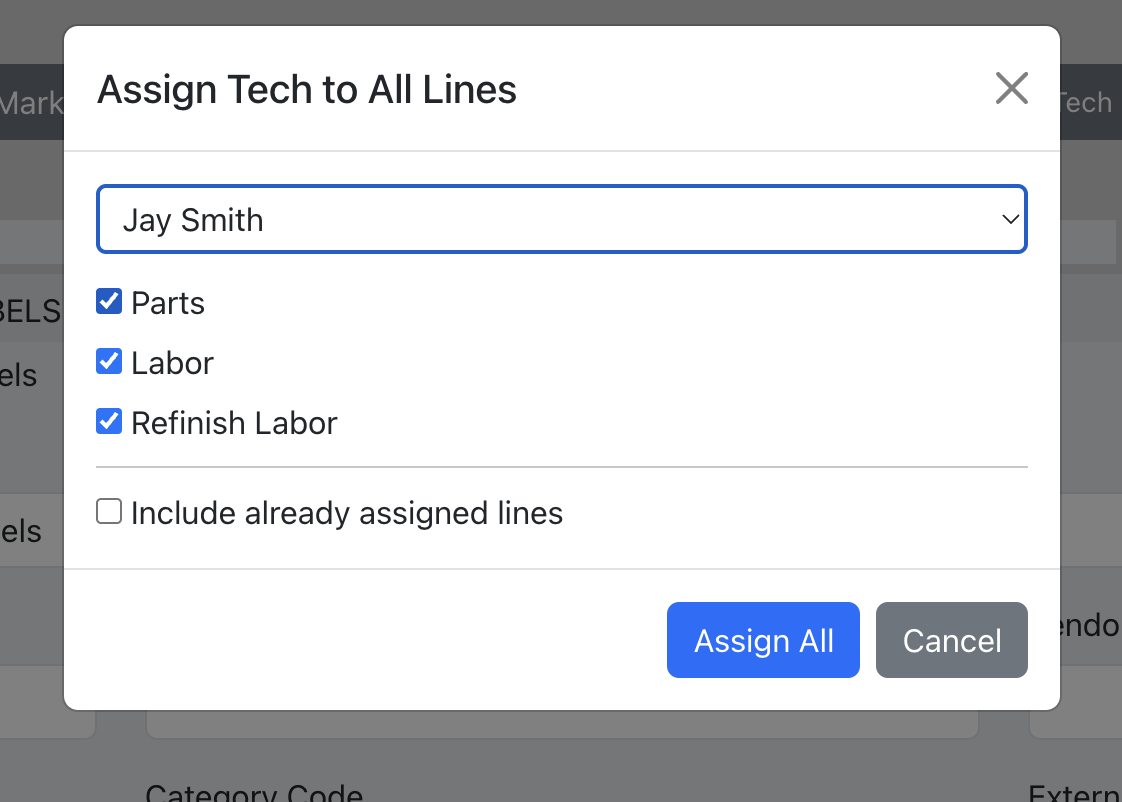
Overview: Bulk-assign a technician to all parts, labor, and/or refinish labor across the job.
- Click "Assign Tech" in the button bar.
- Select a technician from the dropdown.
- Check which sections to apply (Parts, Labor, Refinish).
- Optionally check "Include already assigned lines" to overwrite existing assignments.
- Click "Assign All".
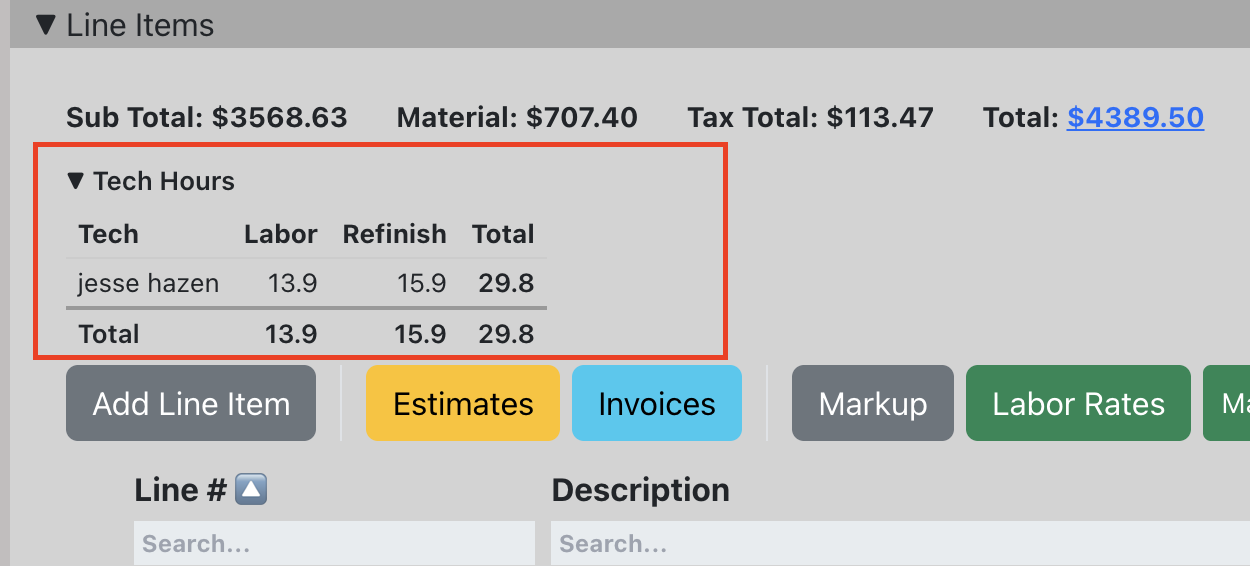
Tech Hours Summary
Overview: A collapsible summary showing total labor and refinish hours per technician. Click "Tech Hours" to expand.
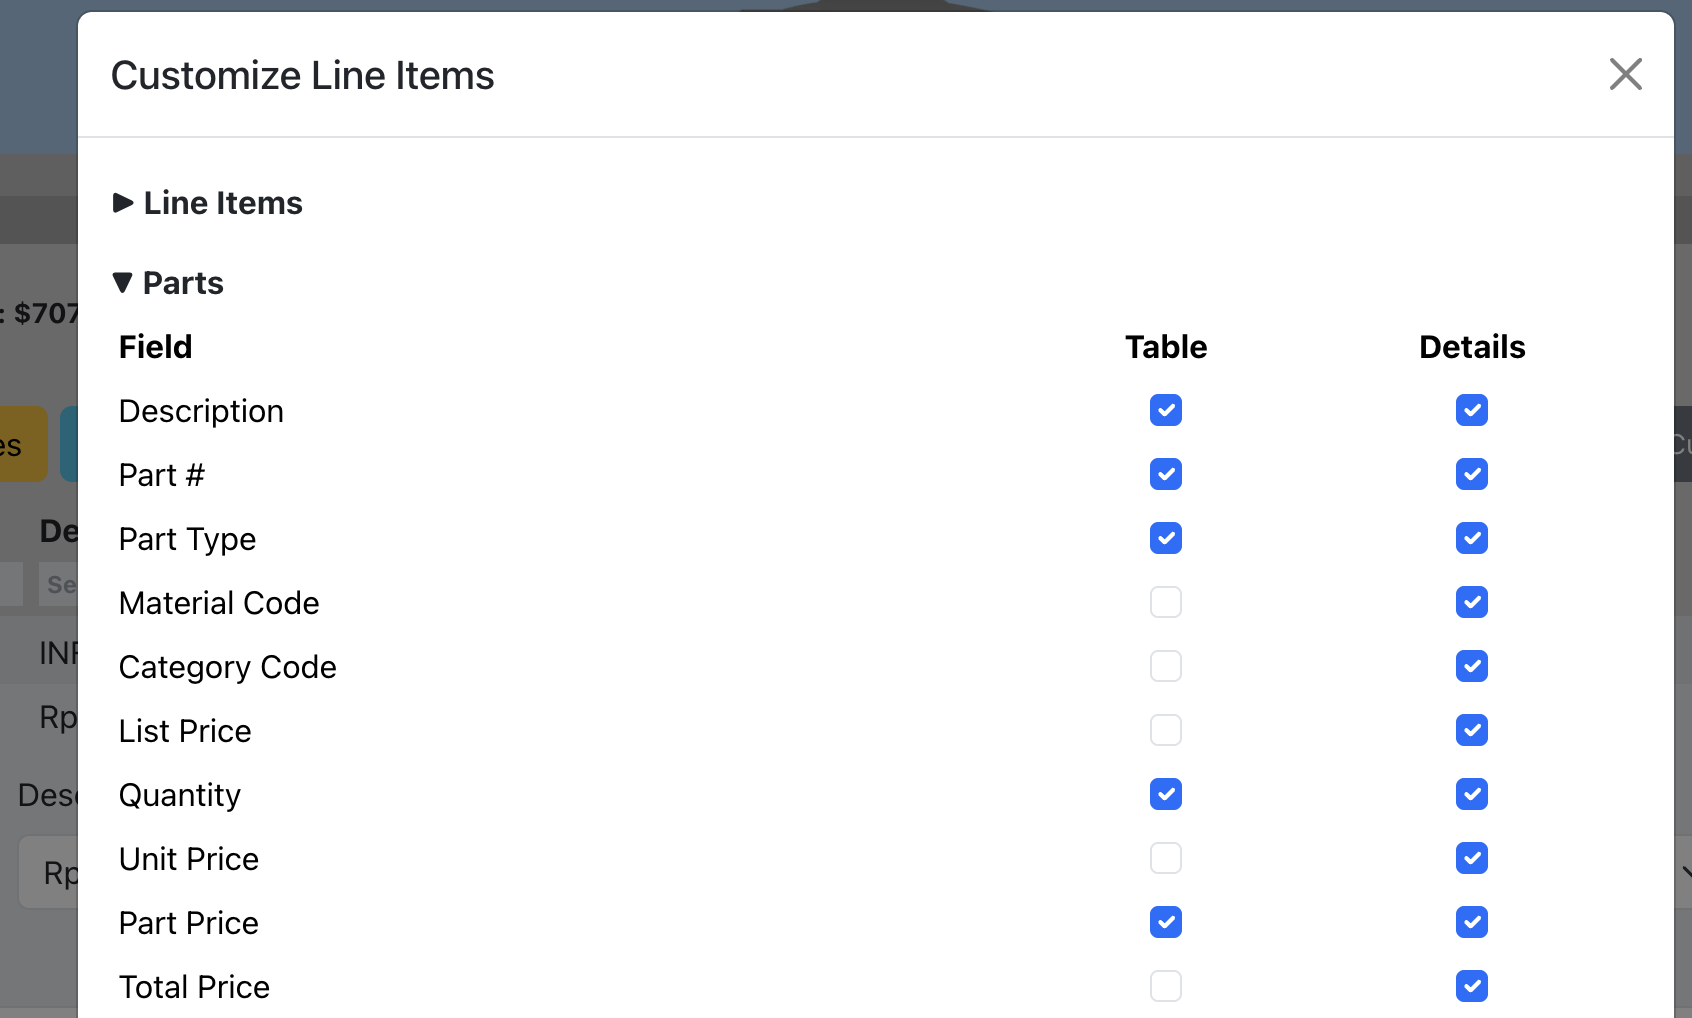
Display Settings
Customize which columns and subsections are visible in the line items view. Settings are saved per device.
- Click the "Customize" button in the line items button bar.
- Toggle columns for the main line item table, parts, labor, and refinish sections.
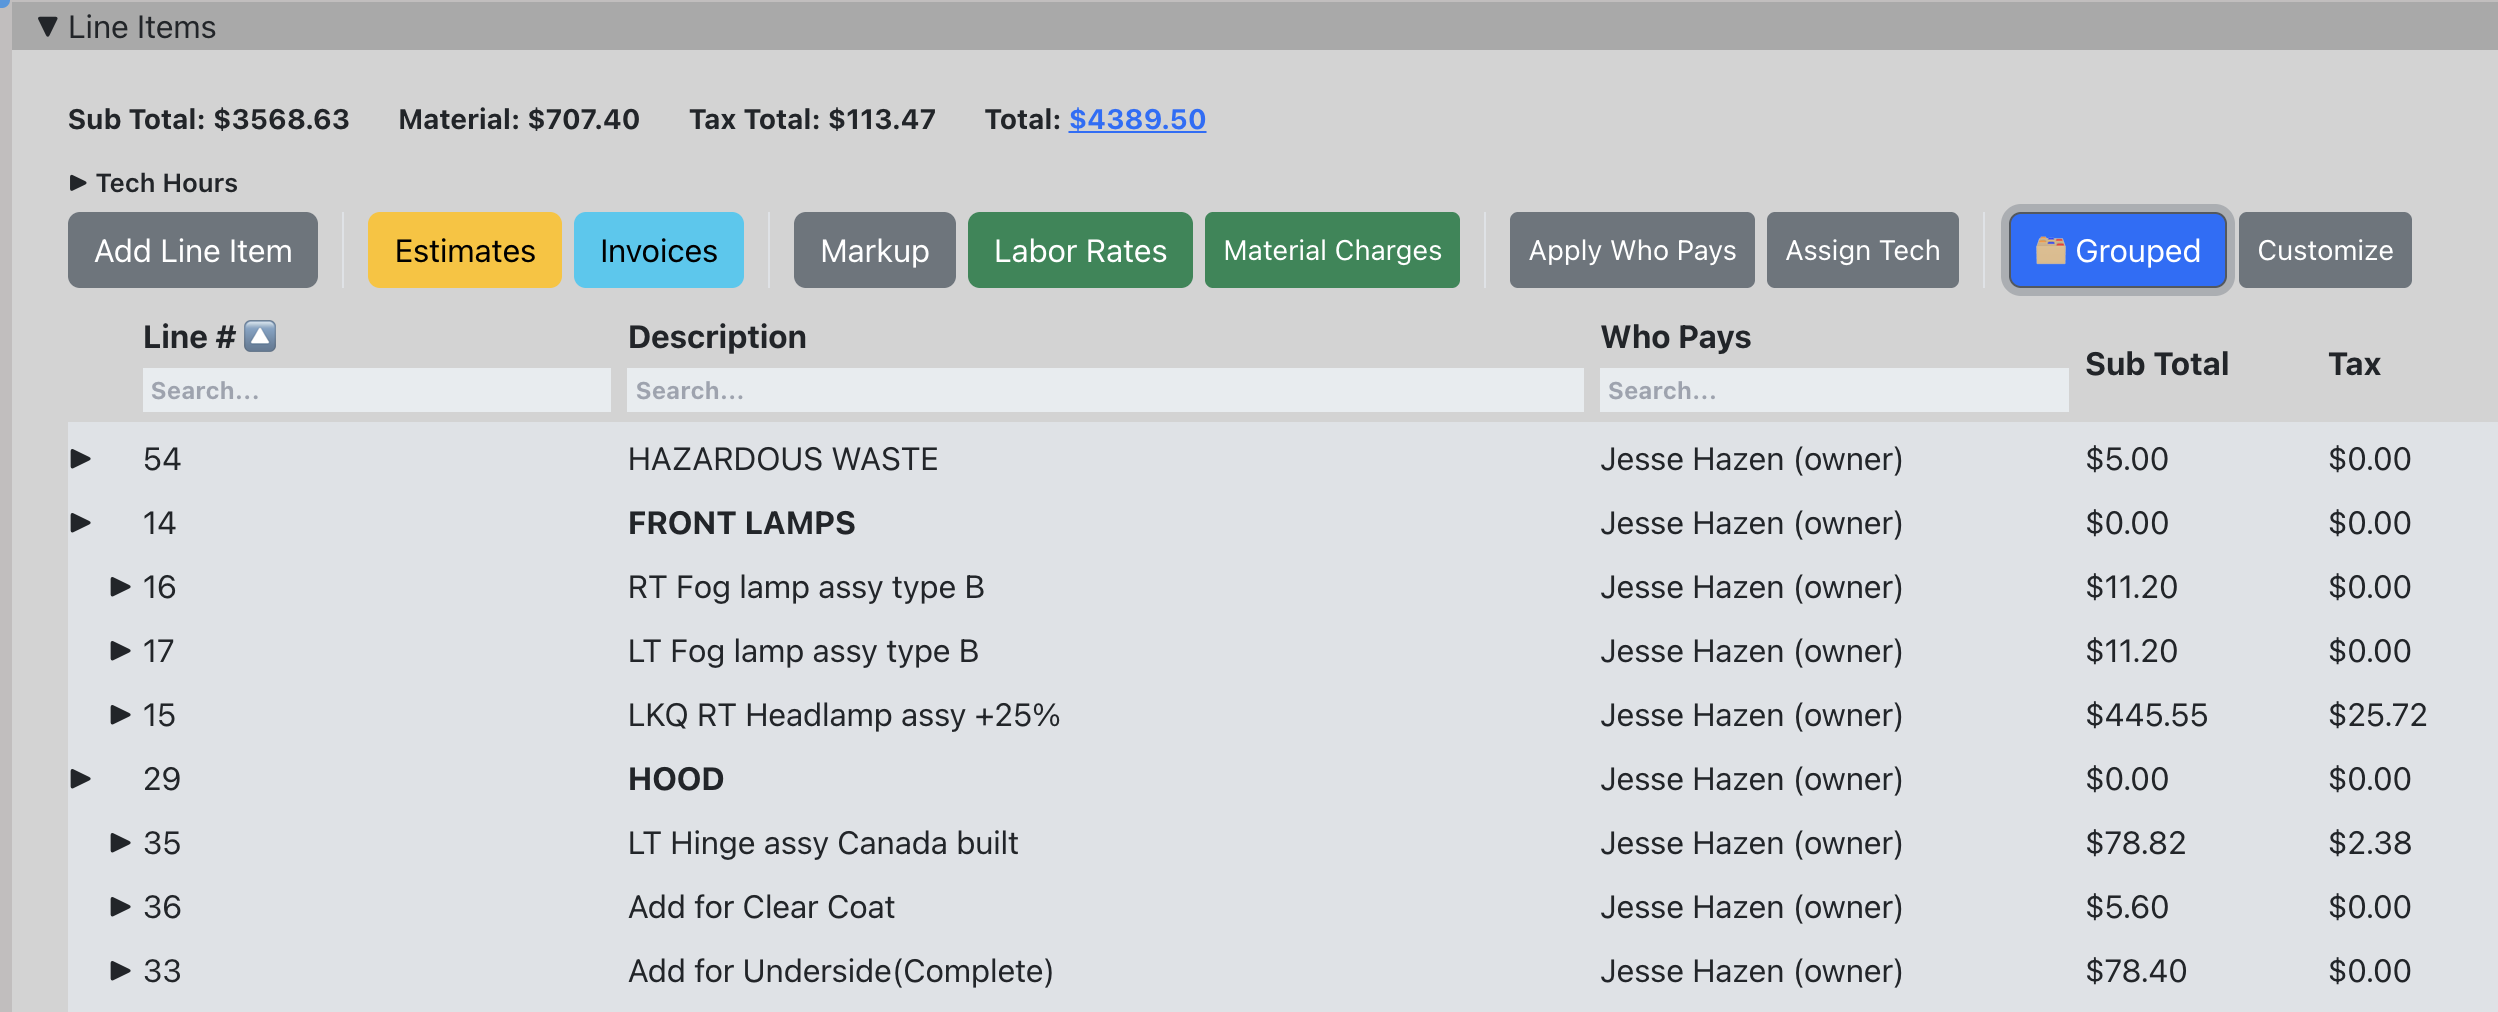
Grouped View
Toggle between flat and grouped views. Grouped view organizes line items by their group line number, showing parent-child relationships with indentation.
- Click the "Flat/Grouped" toggle button.
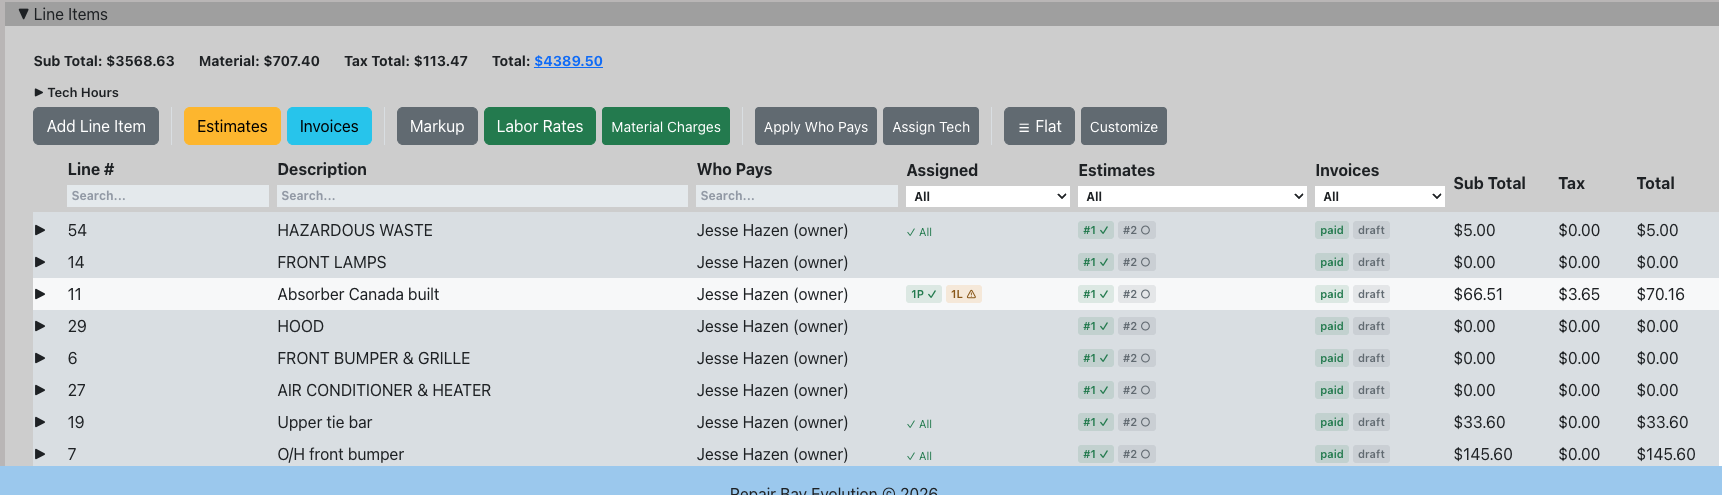
Assigned To, Estimate & Invoice Columns
The line items table includes three columns that help you track responsibility and document status at a glance.
Assigned To
Indicates whether the line item's sub-items (parts, labor, or refinish) have been assigned to a technician. It doesn't show the specific tech's name — it simply lets you see at a glance which line items have assignments and which still need one, without expanding each row.
Estimate
Displays which estimate the line item belongs to. A job can have multiple estimates (for example, a supplement), and this column tells you at a glance which estimate includes each line item. If a line item hasn't been added to any estimate yet, this column will be blank.
Invoice
Shows which invoice the line item is associated with. Similar to the Estimate column, this lets you see whether a line item has been invoiced and which invoice it appears on. Blank means the line item has not yet been placed on an invoice.
All three columns can be shown or hidden using the Display Settings customization panel.
Summary
Click the total amount in the totals bar to open a detailed summary modal. It breaks down parts, labor, refinish, and material charges by type with subtotals, tax, and grand total.